|
|

|
|||||||||||||||||||||||||||||||||
 |
| Repurpose 3d models for iClone Part II Accessories | ||
Level: Beginner Converting 3d models into iClone accessories is basically the same process as props. Except that accessories need to be linked to a character body part. You can do it either in iClone or in 3DS Max . We take another Turbosquid free model for example. Download Fantasie-sword.zip from: http://www.turbosquid.com/FullPreview/Index.cfm/ID/205778 Step 1: Prepare the model. The Author has placed copyright text in the scene which we will remove for the demonstration. Check and modify the model & material settings as described in the previous tutorial (Repurpose 3d models for iClone Part I Props)(Add link here). Remember to set all the material diffuse colors to white (255, 255, 255). Merge the sword parts as a single object into 3ds MAX.
Click "Attach List" button on the "Modify" panel to bring up "Attach List", select all objects then click "Attach", choose "Match Material IDs to Material" option and click "OK". Now the whole sword is a single object.
Set the accessory pivot. Move the pivot to the center as shown in the following figure.
Click "Affect Pivot only" again button to turn the pivot.
Save the scene as sword.max. There are 2 ways to link and position the sword, either in iClone or 3DS Max. See below: Step 2A: Link the accessory to a body part in iClone. Export the vns file. Open iClone. Goto the Avatar > Accessories > Modify tab, Click the folder icon next to the "Import Accessory" field.
Locate and import the sword accessory vns file. The sword may not appear in the proper position or desired size. We'll fix it with the "Modify" panel. On the upper part of the "Modify" panel, the "Accessory List" shows the accessory name and where the accessory is linked to.
You can use the pull-down list to change the position. Let's keep the default "Right Hand". Use "Modify/Adjust" panel to adjust the position, orientation and scale of the sword.
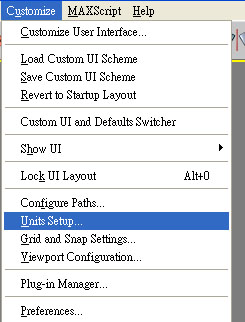
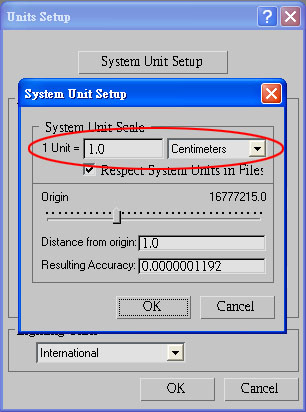
Click the "Add" button below the "Modify panel" to save the sword to the custom accessory assets library inside your "Custom tab". The sword will be in the right position when loaded from the Custom assets next time. Another way to put the sword in place is by linking and naming it properly in 3DS Max before exporting. Step 2B: Link the accessory to a body part in 3ds Max. Open sword.max. Set system unit. Choose Customize>Unit Setup... to bring up "Unit Setup" dialogue, Click "System Unit Setup" button, set System Unit Scale as 1.0 Centimeters.
Merge RL bones, Select [Character01] and click "OK", the RL Bones will be loaded.
Scale and move the sword to a proper place, for example , the right hand.  Now link the sword to the right hand. Select the sword.
Rename the sword object as "Rhand_Sword". (The naming rule is: Bone name_Accessory name) Export the vns file as described earlier. Import the sword vns file in iClone, you'll find that it is put in place as soon as loaded. [End] The technique described in this tutorial can be used to make many kinds of transitioning displays, like TV, signboards, etc. |
||