ZBrush Pipeline
In
iClone3 or 4, when you go to Head > Faces, select one of the Head templates
under Facial Features. There are a total of 8 pre-made templates for you to choose.
But you want to create faces on your own? No problem!
In this tutorial, we will show you how to create a customized head morph as well as a detailed normal map by using
ZBrush.

We have provided head models of iClone3 and iClone4 for you to sculpt in ZBrush. Please make sure you have ZBrush 3.1 or later versions to enable the ZMapper feature.
Where to get the Head Models?
You can simply go to the Developer's Resource and download the G3 and G4 Head (zip file) for your modification.
The mesh structures are different between head models created in
iClone3 and iClone4, therefore we need 2 models to create the head
morphs, one for iClone3 head the other for iClone4 head. Pick the
one that fit your needs, then go on.
Overall ZBrush Pipeline
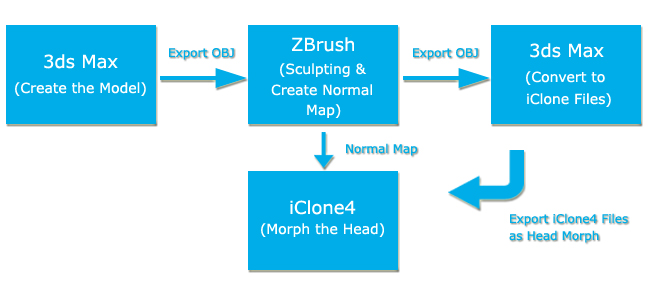
The following illustration gives you an idea of the two methods for exporting the morph head and the textures of Normal Map. One is converting the files through 3ds Max and the other one is through ZBrush into iClone.
Start the Head in 3ds Max
- Open the HeadMorph.max into 3ds Max.
- Export the Head from File > Export > Save as Type: OBJ.
- The "OBJ Exporter" panel appears for you to edit. Set the export options as shown below. Store the faces as "Quads" and check "Texture coordinates", "Normal" and "Smooth".
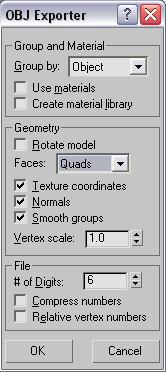
- Click "OK" to export.
Sculpt 3D Head
- Once you launch ZBrush you can then import the 3D Head. Select "Tool" from menu bar then click "Import" button to select the file.
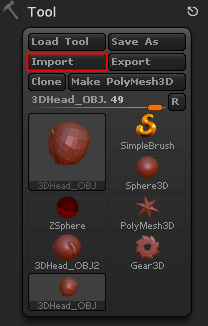
- Add the head by click and drag in the canvas area.
- In "Edit" mode
 with the "Rotate"
 button activate. You may rotate the head to match to the
correct placement of the face position.
button activate. You may rotate the head to match to the
correct placement of the face position. - Select Geometry from the tool's panel of ZBrush.
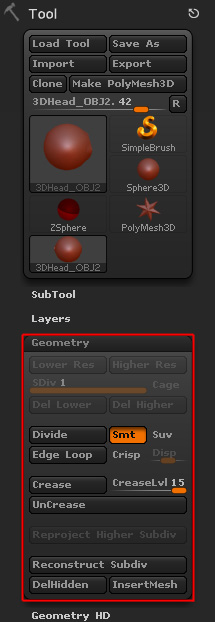
- Click "Divide" as many times to increase the subdivision surfaces. Set the value to 5~6.
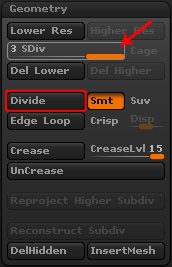
- In ZBrush, there are some handy tools for you to use when tweaking the head texture.
- Sculpting Brushes: The type of brushes you can apply onto the character's skin. The most frequently used brushes are move (for shaping the head by moving points), standard (for building up or carving the model) and pinch for emphasizing wrinkles and creases on the face.
- Please refer to ZBrush Online Help and Tutorials for more information about other tools. Such as alpha and poly painting strokes.
- If you want to enable Symmetry once again, you can go to Transform > Active Symmetry to activate.
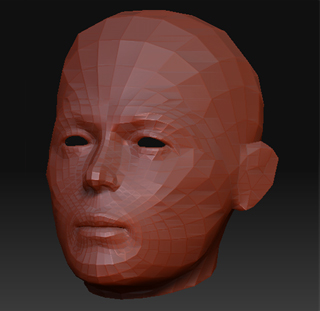 |
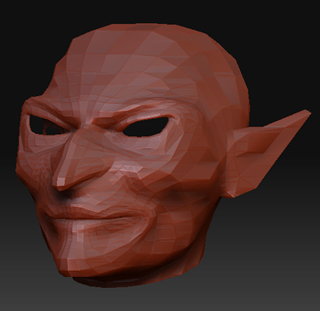 |
| Original G3 Head | Shaping |
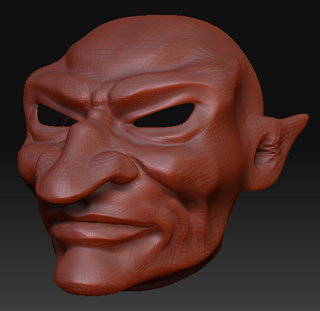 |
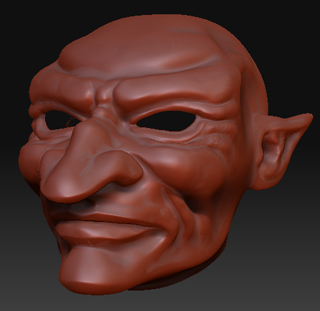 |
| Detailing | Final Result |
- After you have made every details to the skin of the character you can export the character once again, as OBJ. But before we do that, you need to adjust the Subdivision level to the lowest value "1".
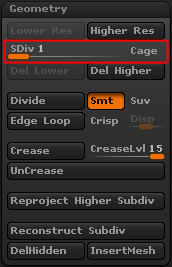
Create Normal Map
In ZBrush there are two paths to access to create Normal Maps. One is from Tool palette Tools > Normal Map. The other path is using the ZMapper plug-in. ZMapper is a more advanced way to create normal maps in ZBrush. Let's see the ZMapper pipeline.
- Click "Zplugin" to activate ZMapper to create Normal Map.
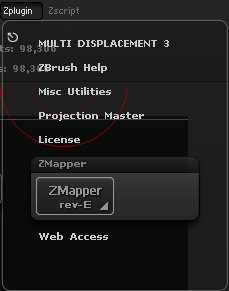
- The ZMapper properties show up. Click "Open Configuration" to select the method ZMapper generate normal map, select "NVidia_TangentSpace_BestQuality.zmp".
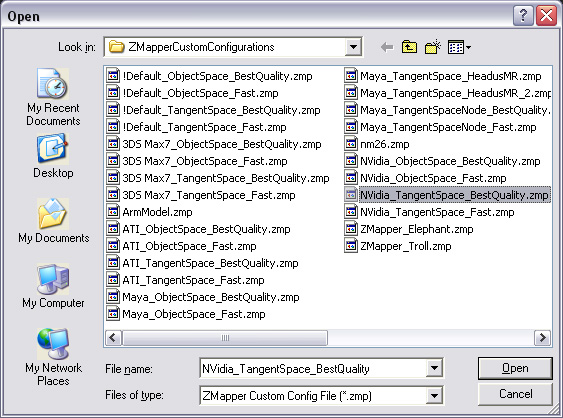
- Click "Create Normal Map" button to generate Normal Map.
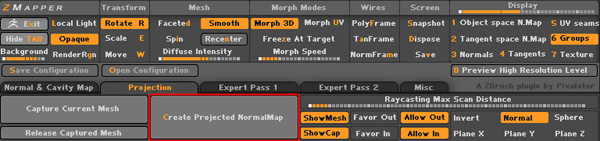
- After render, the Normal Map shows right on the left side panel Texture palette.
 |
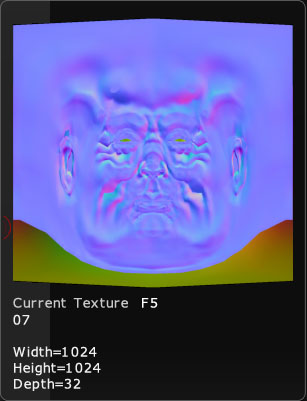 |
| Thumbnail | Normal Map |
- When you are satisfied with the result of the Normal Map, go on to the next step.
Note: the normal map looks flipped on the Face model. Don't worry, the orientation will be correct in iClone.
Export the Normal Map and the Sculpting Head
- Export the Normal Map from the Texture Menu.
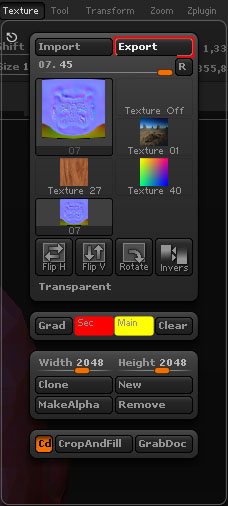
- Export the texture as the bmp image file.
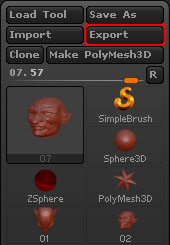
- Since we have sculpt the head we need to export the model as OBJ file from the Tool panel. Click Export button to export the reshaped head model.
Import into 3ds Max to Convert
- Open the original max file HeadMorph.max into 3ds Max.
- Then, import the sculpted head model (.obj) just exported from ZBrush into 3ds Max.
- With the sculpted head in selection. Click the "Align" button
 and select
the head you want to align.
and select
the head you want to align. - Check X, Y, Z axes in the Align Orientation (Local) section.
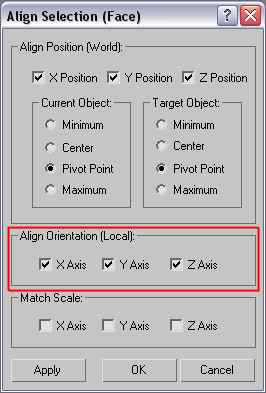
- After you aligned the sculpted
head model is facing downward now because the coordinate offset
between .obj & 3ds Max. (the situation may differs with different obj export and import settings)
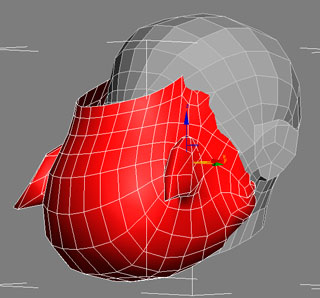
- With the Sculpted Head in selection.
Select "Element"
 from the sub-object selection panel.
Pick the model and adjust the position and orientation of the head manually.
from the sub-object selection panel.
Pick the model and adjust the position and orientation of the head manually.
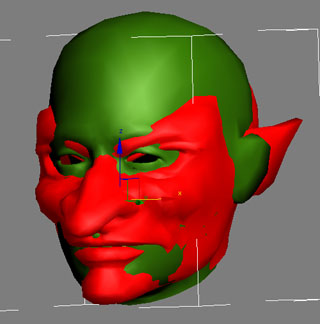
- Align the two G3 Heads as close as possible so both the neck edges match at the same position.
Export Head Morph.
- Delete the original head model. Go to File > Export to export the sculpted head.
- Export as file type "iClone4 File".
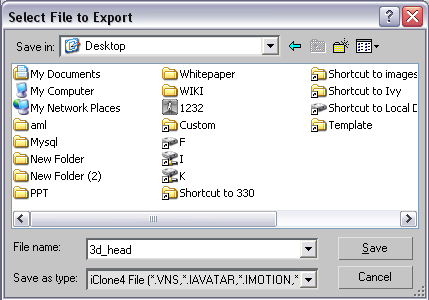
Note: The file type defines it's a iClone4 file.
- In the "Reallusion iClone Panel", select "Head Morph" file type and click the OK button.
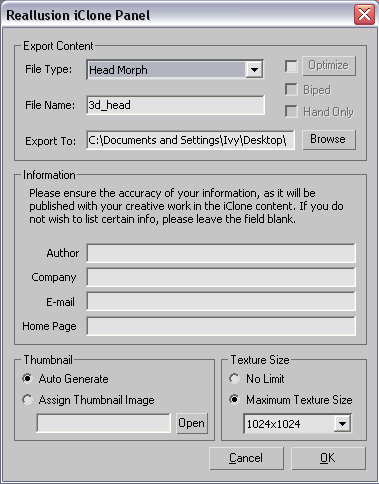
Note: The file type in this iClone panel allows iClone4 application to identify which file type it's for in iClone4. Such as: G2 Standard Character, G3 Standard Character, Non-Standard Character, Character Animation, Non-Human, Accessory, Prop, Terrain, Sky, or Head Morph.
Import Head Morph into iClone
Since we have sculpted the shape of the head, we need to import the head and apply to our character.
- Add a character into the scene.
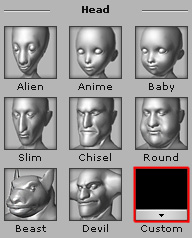
- Go to Head > Faces > Modify panel, click the Custom button in Head section to import the 3d head.
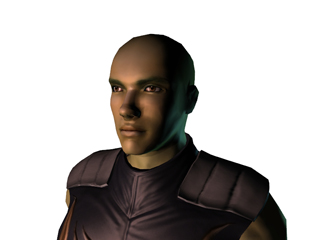
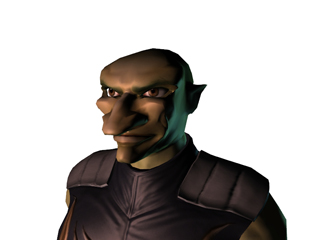
- Use the "Weight" slider to adjust the strength of the head shape.
Strength = 0 Strength = 80
Import Normal Map
Now the head has imported successfully into iClone. We have to import the Normal Map and apply to the 3d head.
- Go to the Actor > Skin > Modify panel.
- Scroll down to the Material & Texture Settings section.
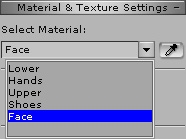
- Select the Face in the Select Material drop-down list.
- Select the Bump channel and double-click to import the map.
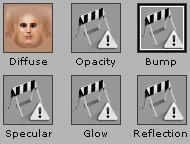
- Check the Import as normal map box. Select your normal map image and click OK.
 |
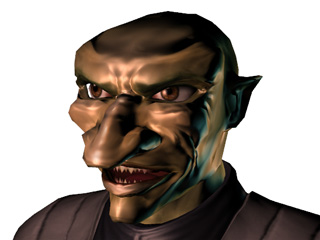 |
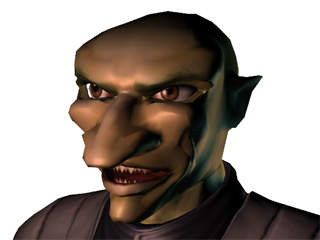
| Before Normal Map Applied | After Normal Map Applied |
Note:
In iClone, make sure
you are in Pixel Shading mode to see the texture. Proper lighting and higher specularity usually make more
outstanding normal map.
Please refer to iClone Online Help for more information about Normal Map.
With ZBrush you can create any type of heads. Imagine when you are creating a story with an old man. To enhance the characteristic of the character you can simply sculpt the shape of the character to fit into your storyline.