Create a prop with animated material could be very useful. What can you do with this?! You can create traffic lights, neon lights and etc...
As you know, material keys can be set in iClone3, however, there in only one track for all the material attributes are stored in a single material key. If you want to create complex material animations, then you need to follow this tutorial...Before you start, there are some rules for you to remember when making animated material for props.
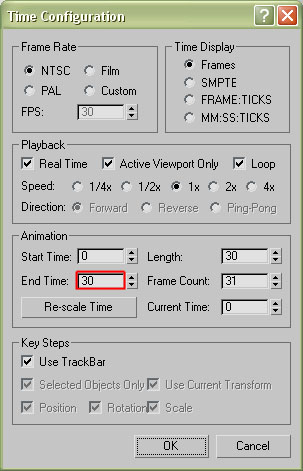
- Define Animation Length in 3ds Max. This may help you set the length of time of the prop.
- Material animation in iClone3 are recorded as keys not clips.

- Two ways to set the animation length,
- In 3ds Max, adjust the length of the start time and end time.
- Or copy and paste the keys in iClone timeline's material channel to have the loop effect.
Assign Material to the Model
- Create a sphere.
- Assign Material to the model. Click "Material
Editor" icon
 in the toolbar.
 - Click one of the empty material slot and apply material type to the selected object.

- Adjust diffuse color for the selected material slot.

- Drag the material to apply the color to the sphere
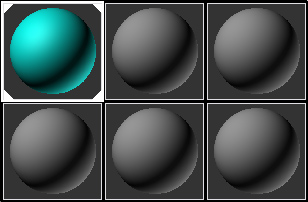
- Name the selected material channel "Color_01".

- You may also set the parameters of the "Specular Highlights" for the selected material to make it look dull or shiny.

In 3ds Max, not only you can adjust the colors and set the keys for the material animation. You can even use waveform or noise controllers in 3ds Max to produce material animation.
The material is steady now, without any effect to the sphere. To create the flashy effect of the material, what we can do now is to add controllers to the material to create flash effect.
- Click
 to open "Curve Editor".
 - In the left side panel click "
 "
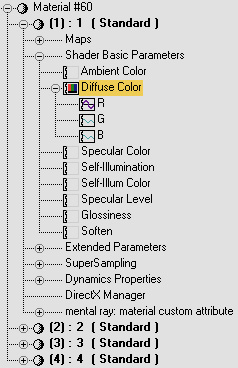
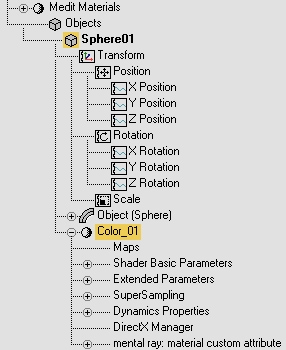
to expand "Color_01",
the material name you assigned for the selected slot.
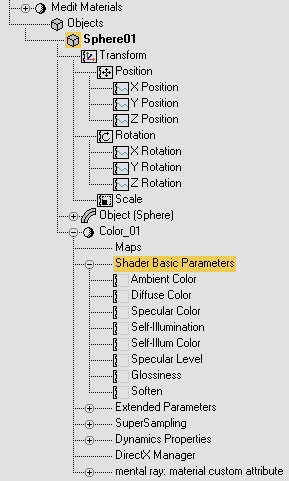
- Expand "Shader Basic Parameters".
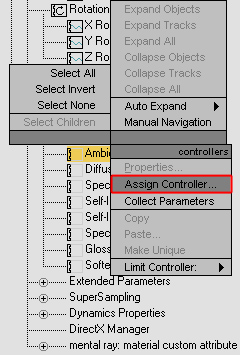
- Select and right-click on "Ambient Color" to assign a controller.
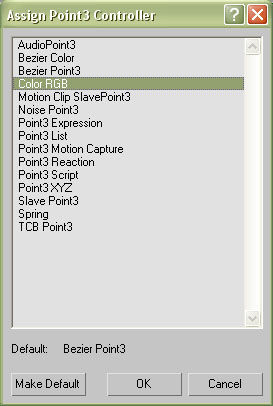
- Assign "Color RGB" to ambient color. Click "OK".
- Now the Ambient
Color attribute has the expansion button "
 " .
" .
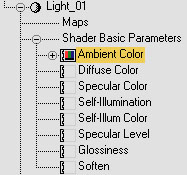
- Expand Ambient Color to view each R, G, B.
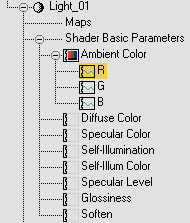
- Select and right-click on "R" to assign another controller type to the sphere.
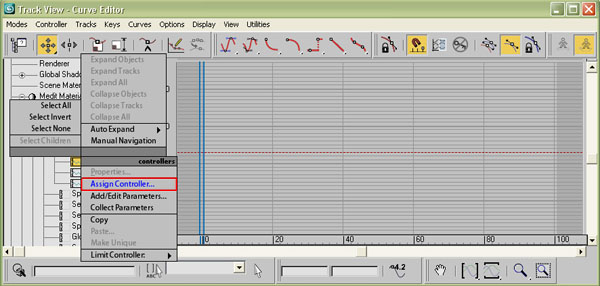
- Assign "Waveform Float" controller to create blinking effect.
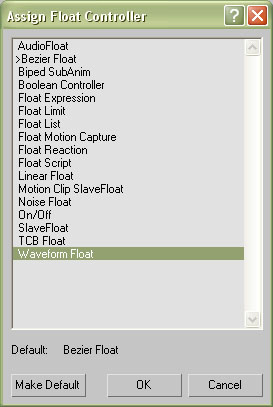
Modify Controller Properties
- Select "R" controller and right-click "Properties" for the waveform controller floater.
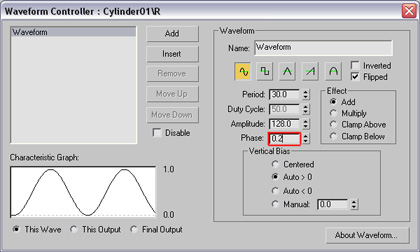
- Adjust the parameters in the "Waveform Controller". Name this waveform "wave01".
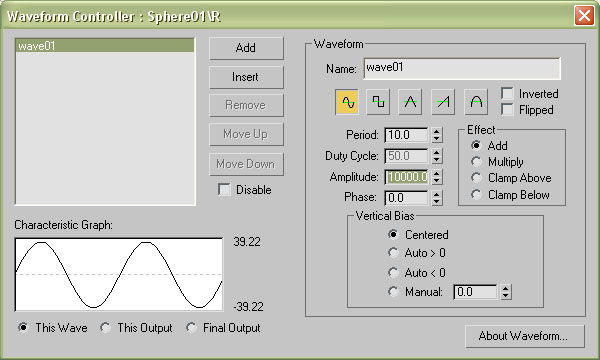
- Specifies one of the waveform types: Sine, Square, Triangle, Sawtooth, and Half.
- Adjust the parameters for "Period" which refers to the number of frames to complete one waveform pattern.
Period = "5" Period = "30"
- Adjust the parameters for "Duty Cycle", this is only available to the square waves only, sets the percentage of time.
- Adjust the parameters for "Amplitude", this sets the height of the wave.
Amplitude = "100" Amplitude = "25000" Since 3ds Max gives us various parameters in the waveform controller floater, you can then design any animated material.
- You can simply change the color of the sphere by selecting the frame of the color you want to change and open up material editor. Click on the diffuse and ambient to change the color of the selected material color channel. Now when you press play the color is different.
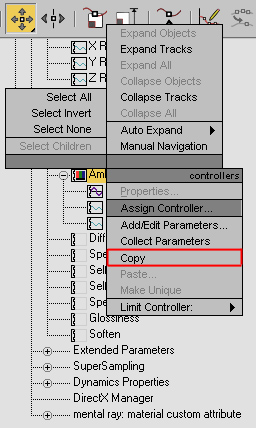
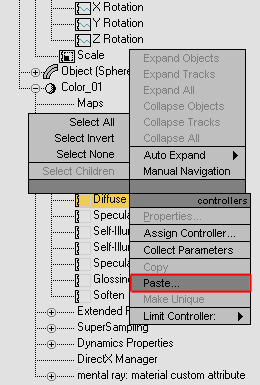
Since the controllers are set for the ambient color, we can simply copy and paste the controller to the diffuse color with the same settings apply.
Select "Ambient Color", right-click to copy the color and paste it to "Diffuse Color".
- Copy Controller
- Paste Controller
Download the Ball_Flash.max file.
Export the Prop
- Go to File > Export.
- Name the prop and export the sphere as "iClone3 File" file type. Click "Save".
- In the "Reallusion iClone Panel" floater. Make sure you select "Prop" as the file type. Give it a file name and place it to your favorite directory. Select "All" in the export option and click "OK".
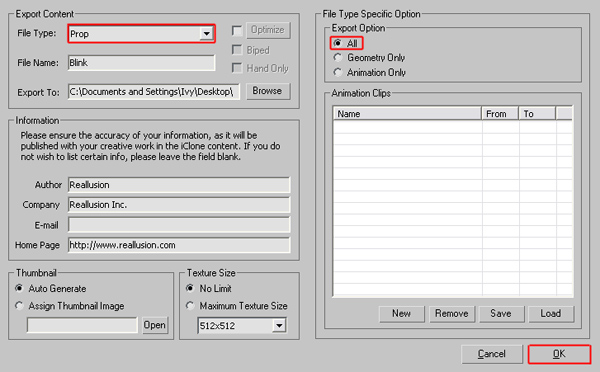
Import into iClone3
- Go to "Set" > "Props" > "Import" in the modify panel. iClone now delivers the sphere right into the scene.
- Click "Play" to preview.
- Click "Show Timeline" and open the "Material" track. Notice that the material track only contains keys not clips.

- In iClone3, you can simply highlight all the keys in the material track to extend the animation length. Copy and paste the keys to extend.

Apply to other Props
Save the material and apply to any other props.
- Select the prop.
- Save the Material.
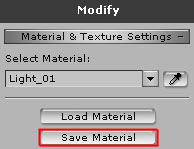
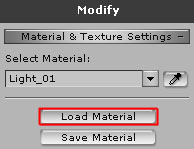
- Drag in any new prop and load the Material to the prop. Load the material you have just saved.
Final Result: Download the Ball_Flash
prop. Add Variation In this section of the tutorial, we will make the
animated material flowing upward.
Edit Material in Curve Editor
Download the Flowing.max
file. Final Result: Download the Flowing prop. Just in a few steps you can create many unique
animated materials to enhance your story.
![]() floater.
floater.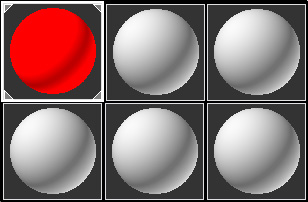
![]() .
.
