iClone G3 Characters contains 6 interchangeable body parts. They are:
5 body parts except Hair are included in each character template max file.
Note: The Head (consists of face, eyes, teeth and cavity models) in the template is still in G2 format. New G3 heads can only be created in iClone3. You may still use this G2 head, or replace it with G3 head after importing the character.
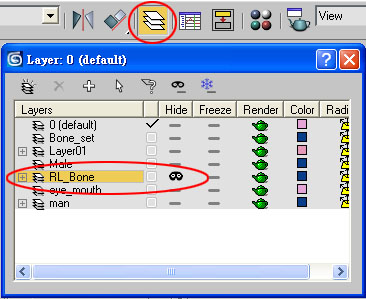
iClone G3 Characters are rigged to RL Bones of the same structure as G2 Characters.
However, the models of G3 Characters are more optimized and with better body build.
The body part connections of G2 and G3 characters are defined differently, so they are not interchangeable between generations.
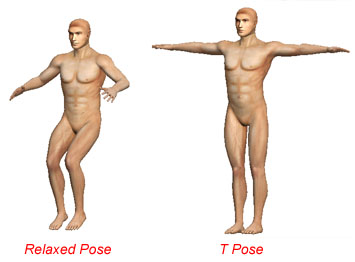
Skin pose is the pose in which the character models are skinned to the skeleton.
The skin pose of G3 Character is relaxed bending posture, rather than T pose which is used for G1 and G2 character.
Although T pose is good for examining character proportions, relaxed skin pose results in better surface deformation while posing or animating the character.
You may choose either way when you edit the character template.
Now the character is always in relaxed pose and you may start editing the character model.
Note: You may delete the first key after deleting the T pose key, the character will still remain in relaxed pose.
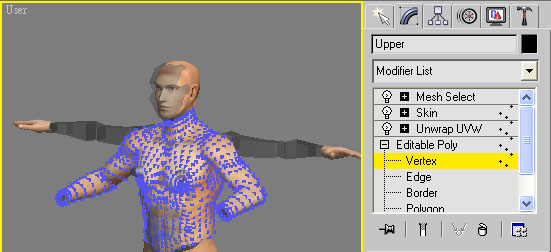
Since the character is skinned in relaxed pose, simply deleting the first key and keeping the T pose key are not enough. The model will go back to relaxed pose when you remove Skin modifier or switch to Editable Poly modifier for editing the meshes. The character model must be re-skinned in T pose for further editing.
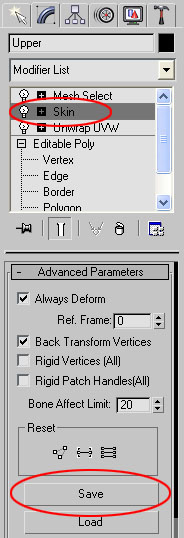
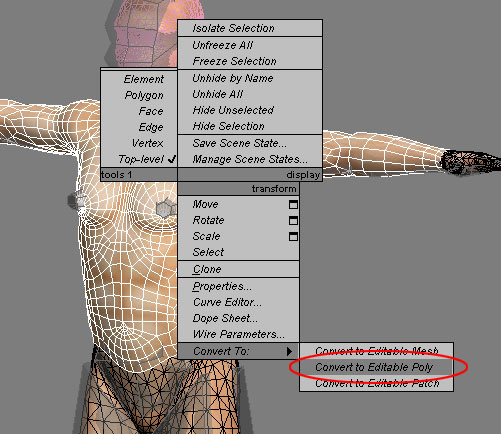
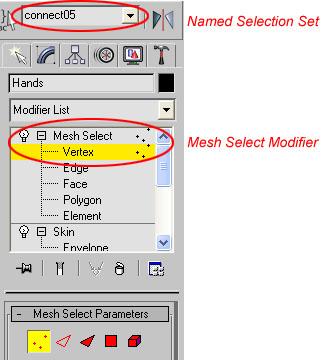
The skin pose is now T pose. The next thing is to restore the body part connection settings by adding "Mesh Select" modifier and assigning named selections set to the vertices to be connected. See next session for more details on body part connection setting.
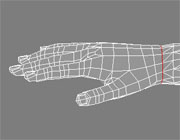
Body part connection settings define which vertices will be connected when the character is loaded in iClone. They are specified by adding "Mesh Select" modifier and giving vertex named selection sets to the vertices on the connection borders.
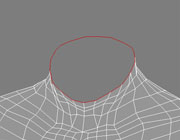
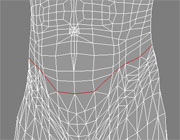
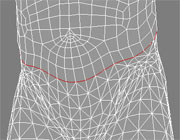
Each connection border has its own specific vertex number and name. The table below shows the body part connection settings of all character generations.
Notice that the vertex numbers and naming of the connection borders of different generations are the same except G3 waist which is named "connect20".
| G1 | G2 | G3 | ||
| Neck | Appearance | 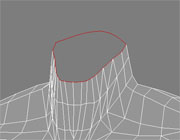 |
 |
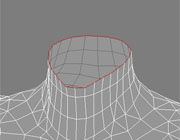 |
| Vertex Number | 24 Vertices | 24 Vertices | 24 Vertices | |
| Named Selection Set | connect01 | connect01 | connect01 | |
| Waist | Appearance | 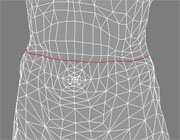 |
 |
 |
| Vertex Number | 28 Vertices | 28 Vertices | 28 Vertices | |
| Named Selection Set | connect02 | connect02 | connect20 | |
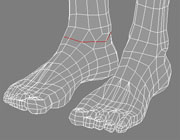
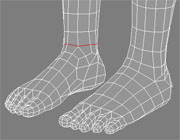
| Left Ankle | Appearance |  |
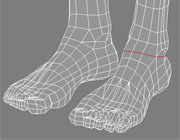 |
 |
| Vertex Number | 12 Vertices | 12 Vertices | 12 Vertices | |
| Named Selection Set | connect03 | connect03 | connect06 | |
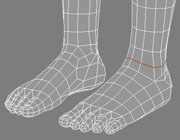
| Right Ankle | Appearance | 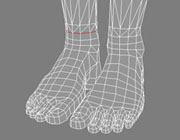 |
 |
 |
| Vertex Number | 12 Vertices | 12 Vertices | 12 Vertices | |
| Named Selection Set | connect04 | connect04 | connect06 | |
| Left Wrist | Appearance | N/A | 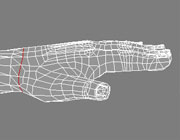 |
 |
| Vertex Number | 12 Vertices | 12 Vertices | ||
| Named Selection Set | connect05 | connect05 | ||
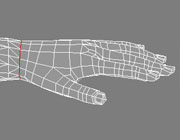
| Right Wrist | Appearance | N/A | 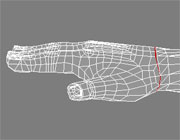 |
 |
| Vertex Number | 12 Vertices | 12 Vertices | ||
| Named Selection Set | connect06 | connect06 |
When you edit the character model, adding or deleting vertices or faces may alter the skin weights and named selections. You may have to check and reassign them to achieve correct result. Please refer to the white paper for more details on creating iClone characters.