Creating a Magic Circle - Apply UVW Map
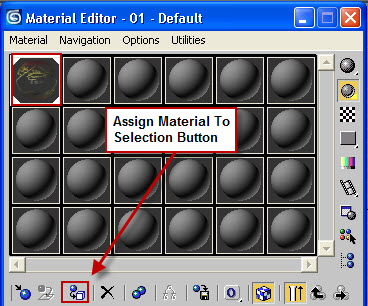
7. Press M to open the Material Editor. With the Cylinder selected press the "Assign Material To Selection" button to map the cylinder with the material:
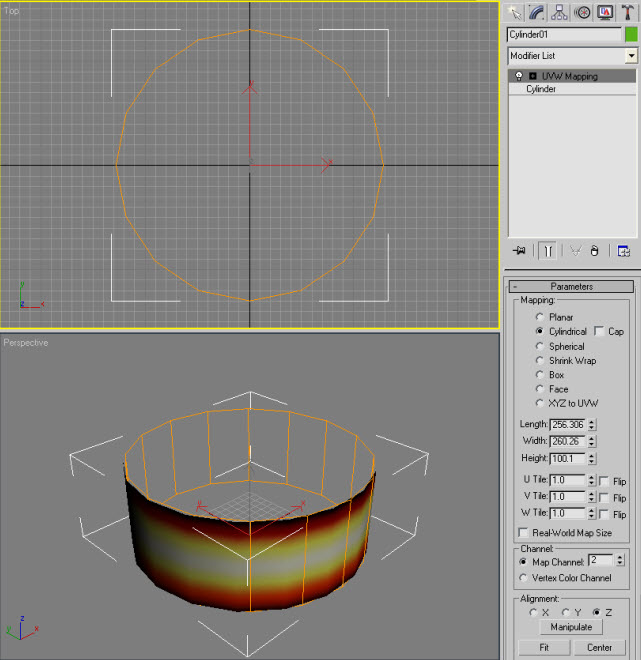
Result of Mapping:
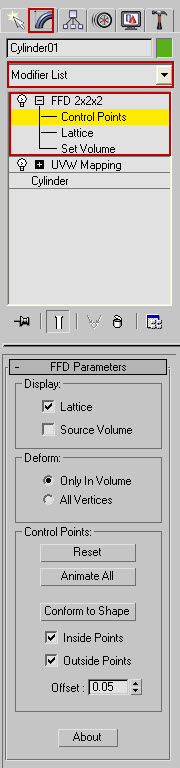
8. From the Modifier List dropdown menu add a FFD 2X2X2 modifier. Open the FFD modifier by pressing the small "+ (plus) sign in front of it and select Control Points:
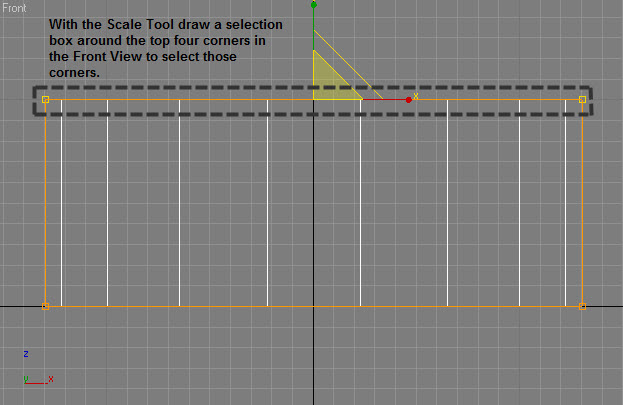
9. Use the Scale Tool to draw a selection box around the top four corners of the Control Points on the cylinder to select them:
10. With top Control Points selected scale the upper corners of the lattice to the center of the cylinder as shown below:
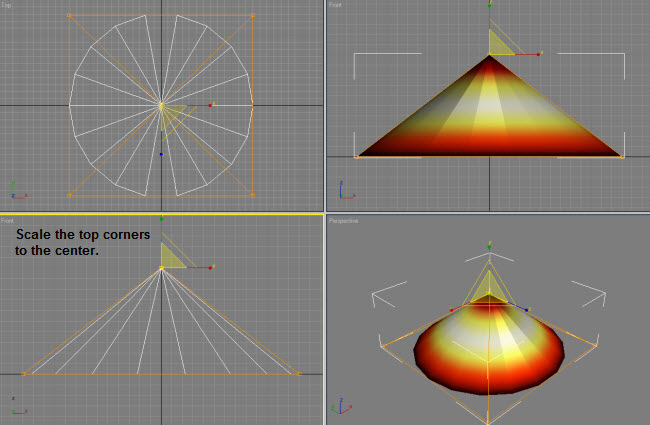
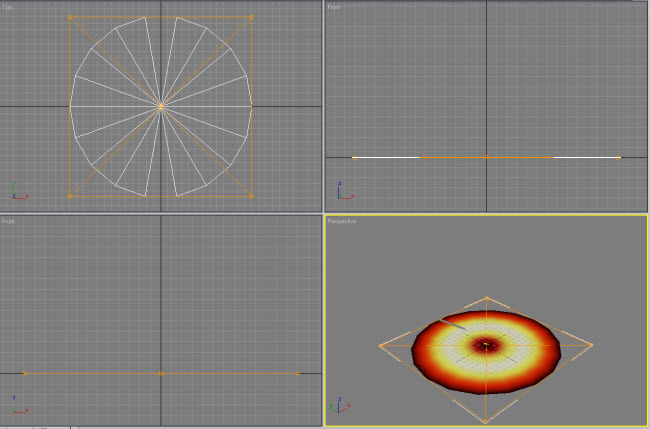
11. Switch to the Select and Move tool and with the Control Points still selected move them down to flatten the mesh.
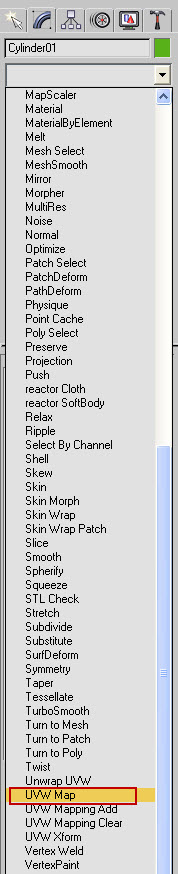
12.Add a second UVW Map modifier to the stack with the modifier list dropdown menu:
 Result ---
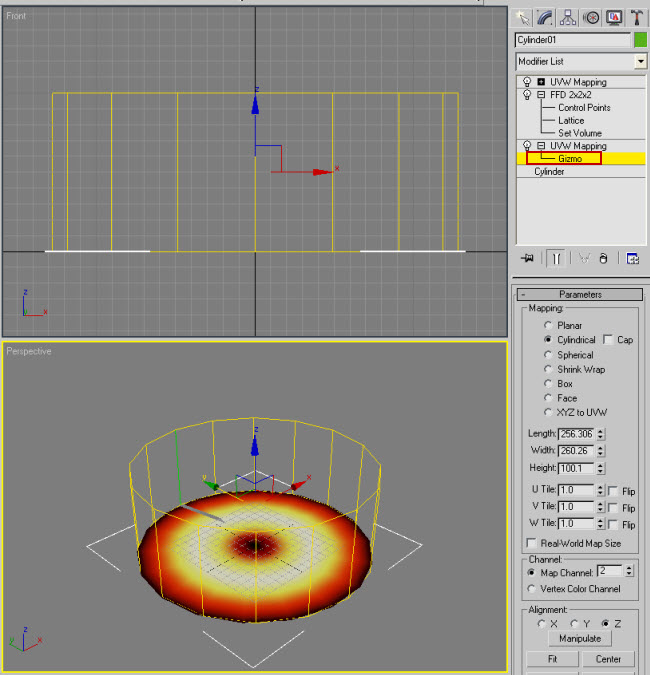
13. Open the FIRST UVW Map modifier by clicking on the small + (plus) sign in front of it and select the GIZMO:
14. Move the Slider to Frame 100 and press Auto Key:

15. With the Select and Move tool move the UVW Map Gizmo Down as shown below:
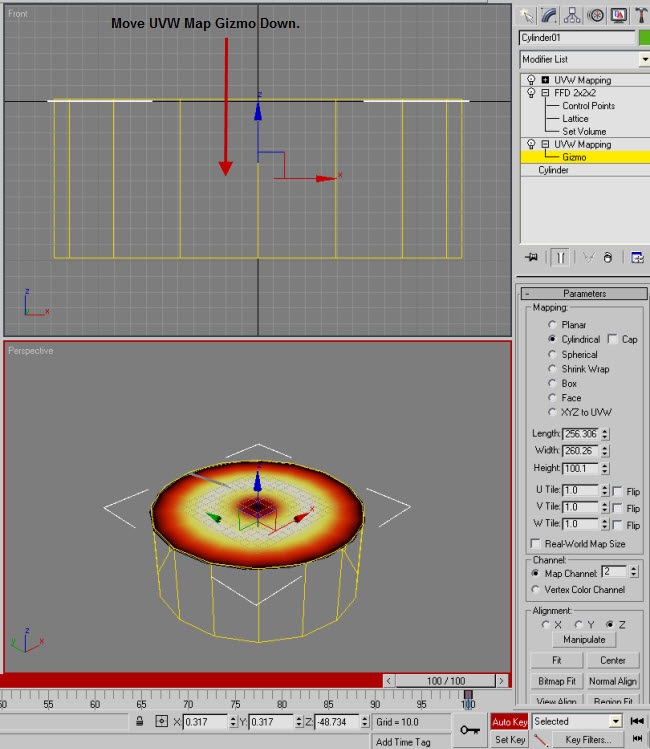
16. Click Auto Key to turn it off.
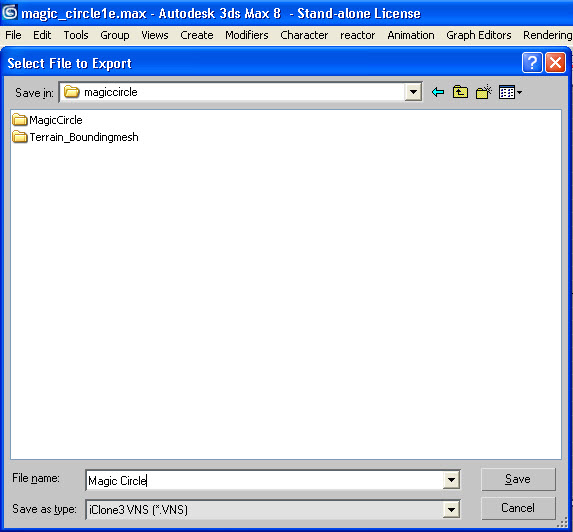
17. Click File > Export and select iClone3 VNS in the File Type dropdown box:
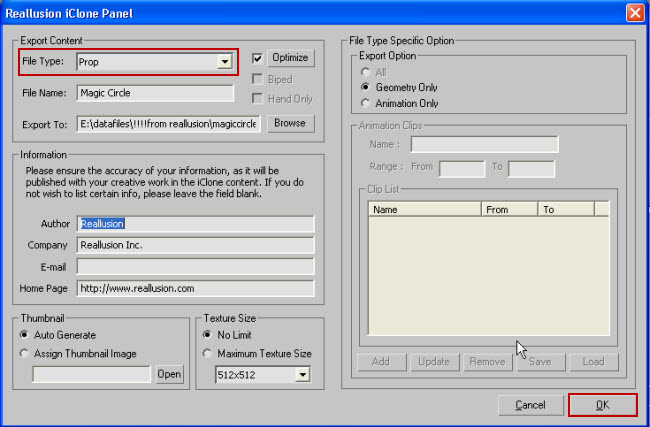
Select Prop as File Type in the export dialog and click OK.
18. Import into iClone:
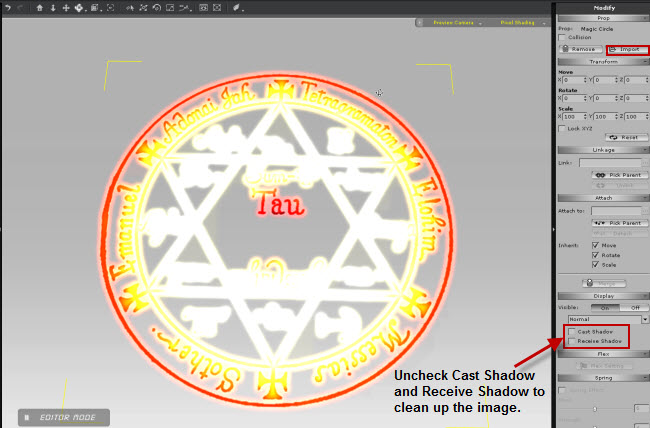
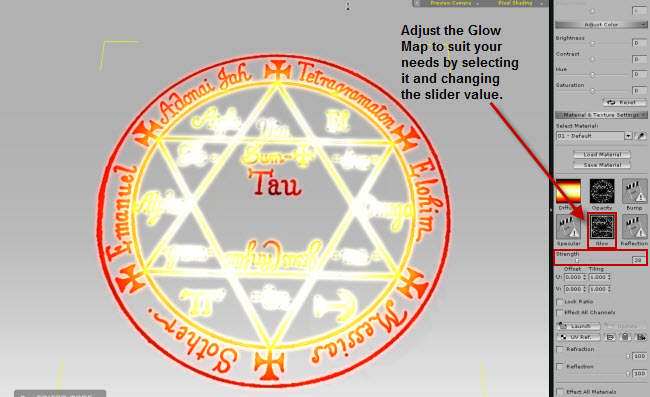
You can also make adjustments to the Glow Map:
End of Section
Download: Magic Circle(3ds Max), Magic Circle (iClone)
Creating a Magic Circle
- Setup Material Channel
- Apply UVW Map