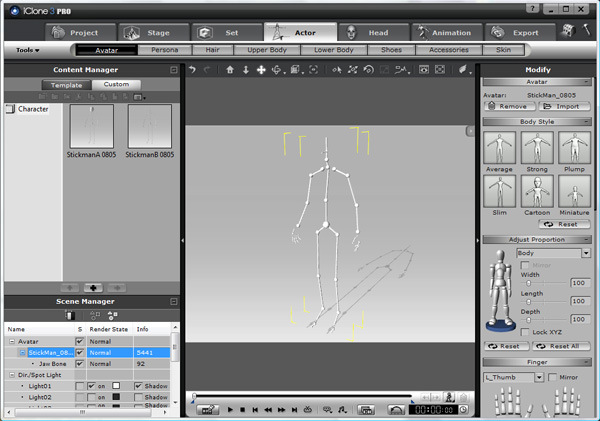
Modify the Components in iClone
- Launch up iClone3. Load in one of your CloneBone, either Actor or Custom.
- Click on the "Set" > "Props" > "Custom". If you have saved the props to the default directory, then all your props should appear in the custom template.
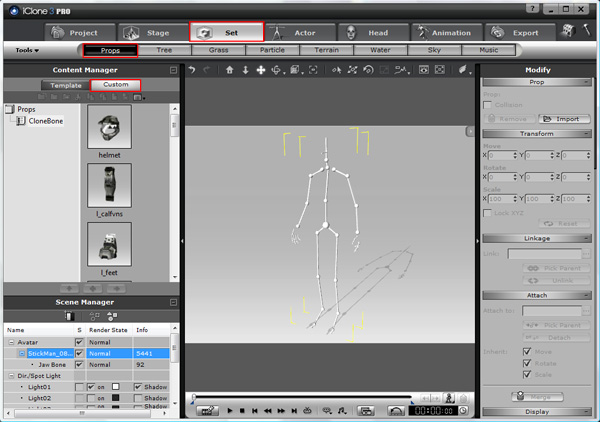
- Double click to import a component into the scene.
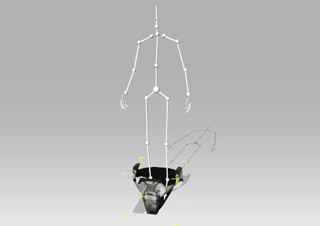
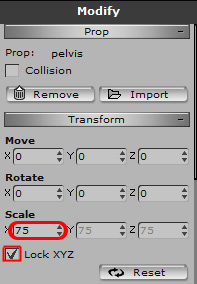
- You may notice that the size of the component is too big. You may go to the prop's modify panel and have "Lock XYZ" checked. This option allows you to set the universal size of the component, XYZ all at the same time.
- Have the component in selection. Click "Pick Parent" in the "Attach" section.
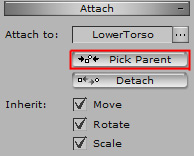
- Click the "Attach
to..."
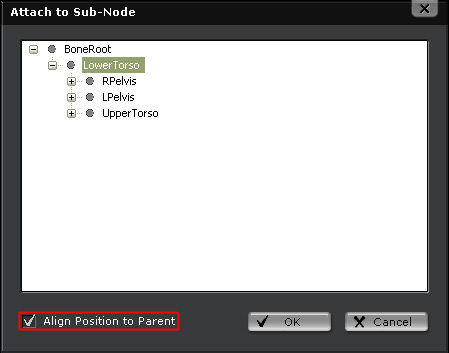
 in the attach section in the modify panel to open up "Attach to
Sub-Node". Make sure that the target bone node is picked and "Align
Position to Parent" is checked.
in the attach section in the modify panel to open up "Attach to
Sub-Node". Make sure that the target bone node is picked and "Align
Position to Parent" is checked.
- Use the move and rotate tool to correctly position the component to the location of the bone.

- Repeat step 3 to step 6 for all the other components to build up the character.
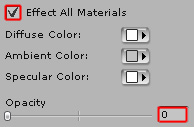
- After you have attached all the parts to the character. Make the CloneBone invisible by selecting the "StickMan" in the scene manager. Go to "Actor" > "Skin" and turn the opacity of the stickman to zero.
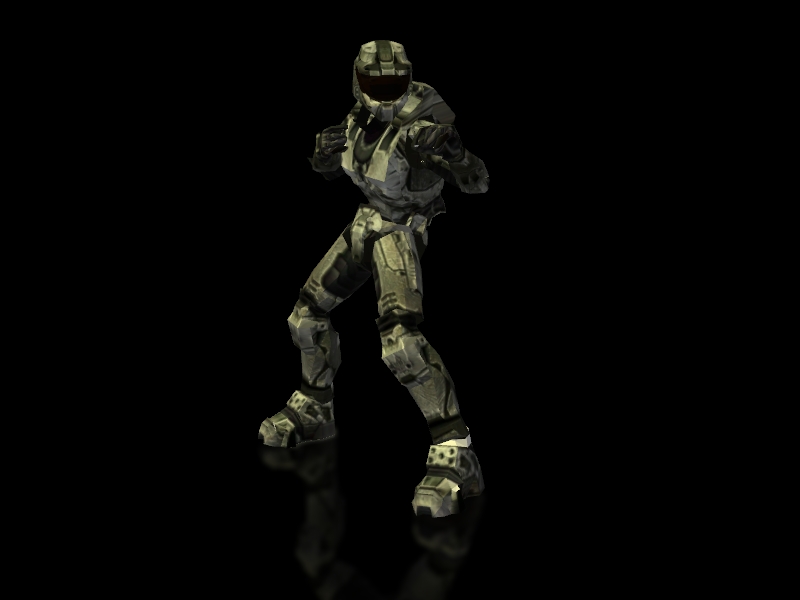
- See! I have built up my own unique character.
Note:
What if the component blocks the bone?! Don't worry! First, attach the
prop to other bones
available and then move the prop to the bone you want to attach to.
Animate the Character
Well! Each component is now attached to the character. Can I apply a motion to the character? Sure, you can!
- Click on Animation > Motion and with the selection of CloneBone (StickMan) in the "Scene Manager". Apply a motion to the CloneBone (StickMan).

- Here you go! My unique customized character.
CloneBone Magic
- Choose a Model
- Export each Component from 3DXchange
- Modify the Components in iClone