Dressing up the Character with Custom Clothing Meshes
When adding clothes to your character, you are able to design the appearance and style of the clothing in 3ds Max or an external program,
and then add the clothing meshes as elements of the body parts that wear them in 3ds Max.
You are NOT able to export the clothes separately and put them on a nude character in iClone 5.
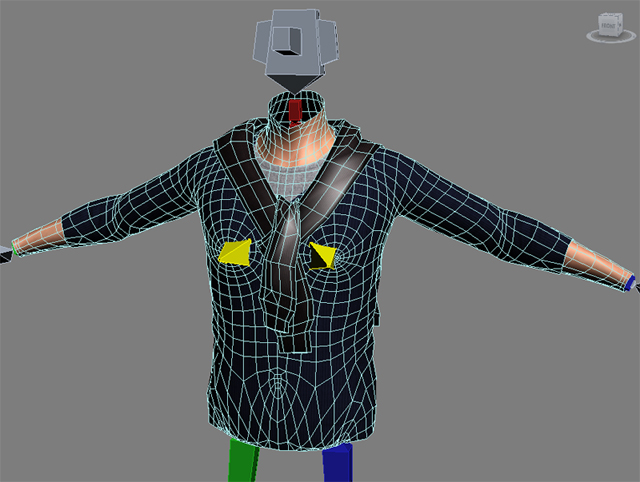
The body parts that you are able to add clothing to are RL_Upper, RL_Lower, RL_Hands, and RL_Shoes. When these body parts have clothing applied to them, they will then contain multiple elements.
|
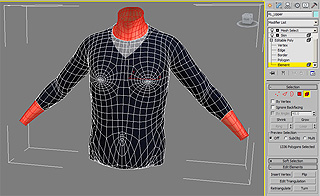
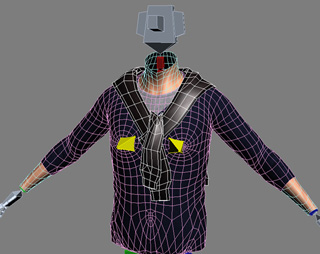
RL_Upper with Multi-elements
|
|
|
|
Body element (highlighted in red).
|
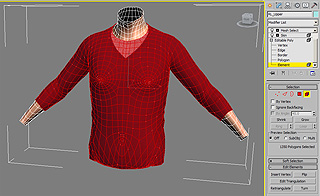
Clothes element (highlighted in red).
|
Dressing up a Nude Character
-
Go to frame 0.

-
Produce your clothes mesh.
-
Skin the clothes mesh to the suggested bones. Please refer to the Body Skinning and Rigging section for more information.
-
Name the clothes mesh as RL_Upper_cloth (temporary).

-
Move the base bones around to check the skinning result and modify the artifacts if needed.
-
Follow the same steps to create another cloth that is tied around the character's shoulders. Name it as RL_Upper_plus (temporary).
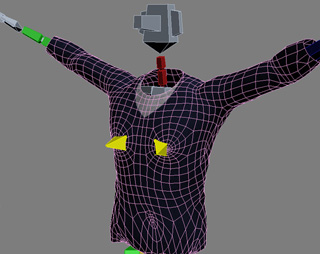
Currently, you have created three independent meshes that are named RL_Upper, RL_Upper_cloth, and RL_Upper_plus.
Their wireframe colors are blue, purple and white in the illustration below:
Combining Elements into One Mesh
In 3ds Max 2010, you may use the Skin Warp feature to combine the skinning information of the three mesh entities into one by passing the skinning data of
each of the meshes.
Please note that the following steps are irreversable, please save the project to keep the complete skinning data before proceeding to this section.
Preparation
-
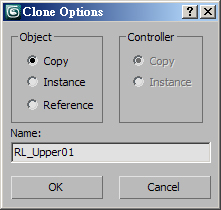
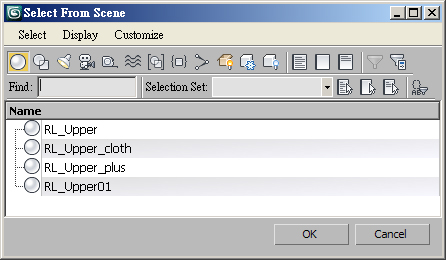
Multi-select the RL_Upper, RL_Upper_cloth, and RL_Upper_plus. In the object mode, apply Clone >> Copy.
-
The cloned new meshes will be auto-named RL_Upper01, RL_Upper_cloth01, and RL_Upper_Plus01.
-
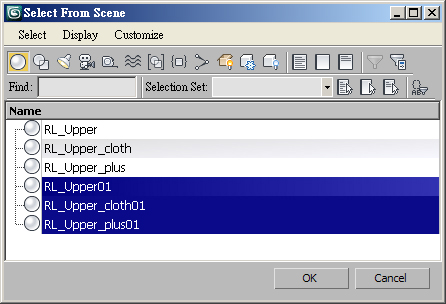
Multi-select the RL_Upper01, RL_Upper_cloth01, and RL_Upper_Plus01.
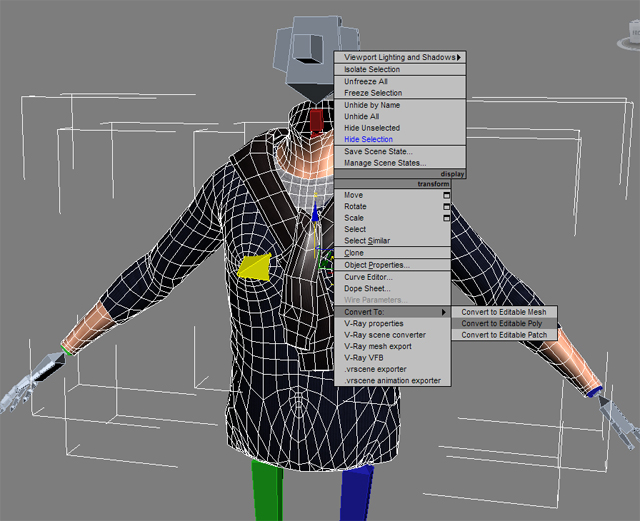
-
Right click on the screen and choose the Convert to Editable Poly command from the pop-up menu.
-
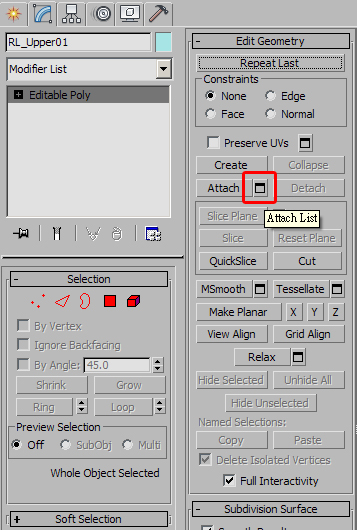
Select the RL_Upper01 and click the Attach List button in the modify panel.
-
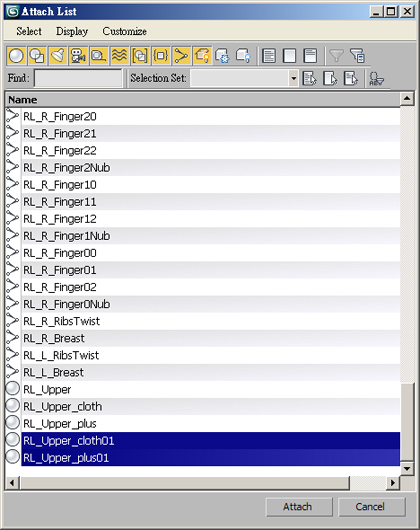
Add the cloned RL_Upper_cloth01, RL_Upper_plus01 by selecting them in the list and click the Attach button.
-
Choose the Match Material IDs to Material radio button in the Attach Option panel and click the OK button.

-
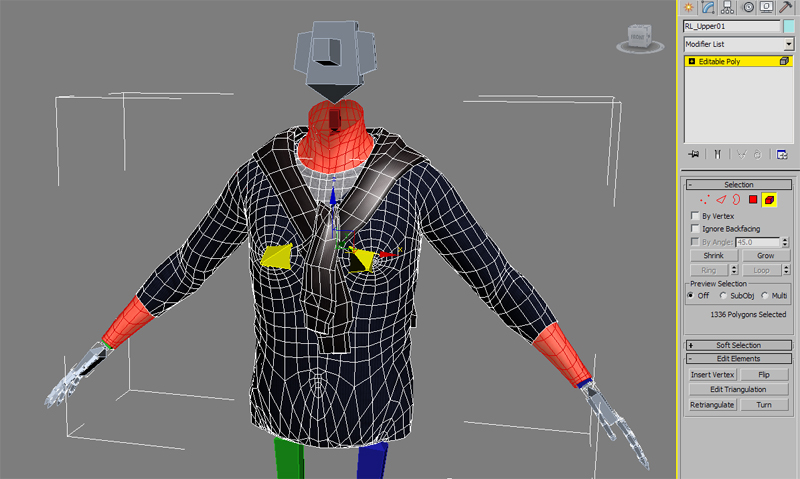
The RL_Upper01 is now a mesh consisting of body and two clothes meshes.
-
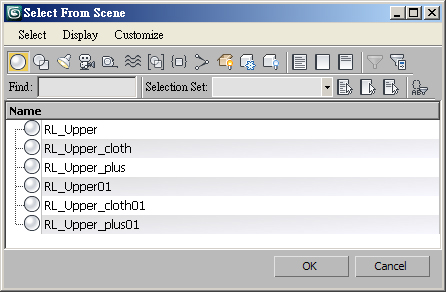
Make sure that there are four sets of meshes: RL_Upper, RL_Upper_cloth, RL_Upper_plus, and RL_Upper01.
-
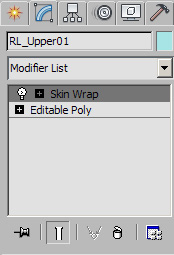
Select the RL_Upper01, pick the Skin Warp in the modify panel.
-
In the Parameters section, set the Deformation Engine to Face Deformation.
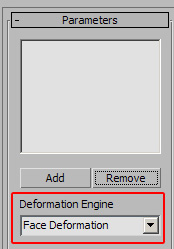
-
At frame 0, click the Add button in the Parameters section.
Passing the Skinning Data
-
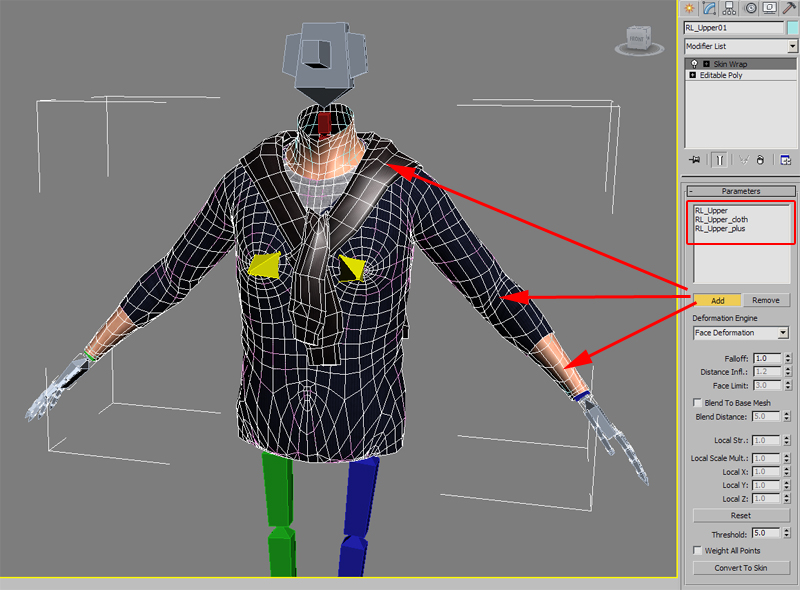
Pick the RL_Upper, RL_Upper_cloth, and RL_Upper_plus sections in the work area. They will be added into the list.
-
The skinning data of RL_Upper, RL_Upper_cloth, and RL_Upper_plus will be successfully passed to the RL_Upper01. You may move the bones to
visually check for errors in the skinning result of the RL_Upper01.
-
Now you need to convert the RL_Upper, RL_Upper_cloth, and RL_Upper_plus to RL_Upper01 so that the RL_Upper01 can have its own skin data.
Activate the Weight All Point and click the Convert to Skin button.
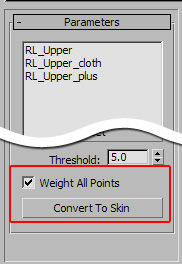
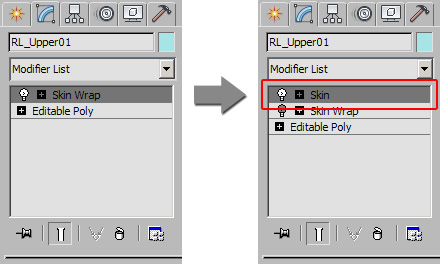
A new Skin modifier will be auto-generated in the list.
Please note that the conversion may occasionally fail, which will cause mesh distortions. You may undo this step and deactivate the Weight All Point
option and try once again. The conversion should then complete successfully.
The skinning data of the RL_Upper, RL_Upper_cloth, and RL_Upper_plus has now been passed to the new mesh named RL_Upper01.
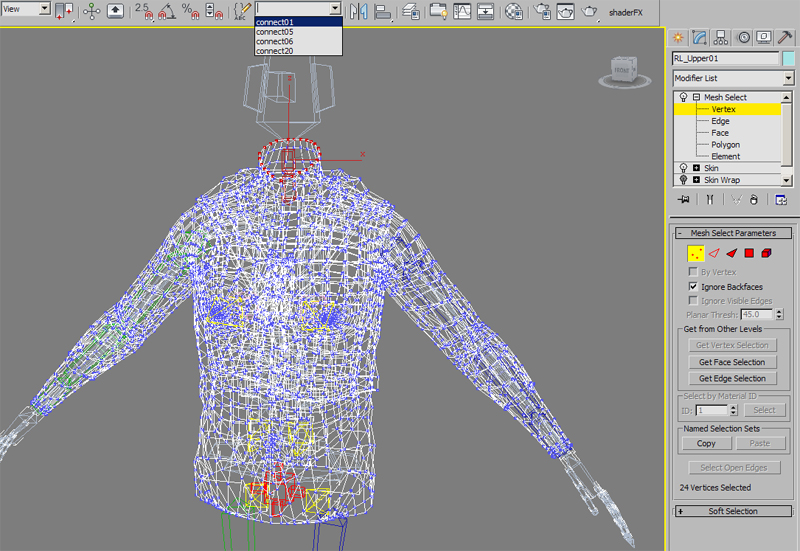
Passing the Names of Connecting Lines
After the skinning data of the original RL_Upper, RL_Upper_cloth, and RL_Upper_plus has been passed to the new mesh, RL_Upper01, you need to pass all the
connecting lines settings from RL_Upper to the new mesh as well.
-
Select the Mesh Select of the RL_Upper. Right click on it and choose the Copy command.
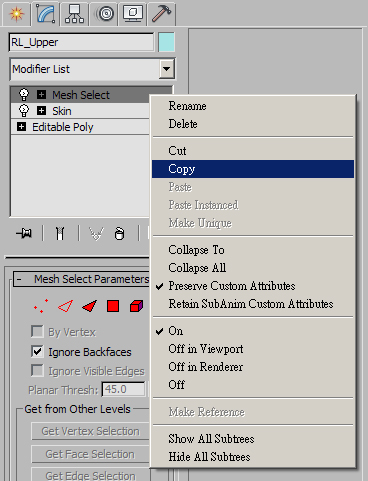
-
Select the new mesh named RL_Upper01; right click on the Skin modifier and choose the Paste command.
Please make sure that the Mesh Select modifier is above the Skin modifier in the list.
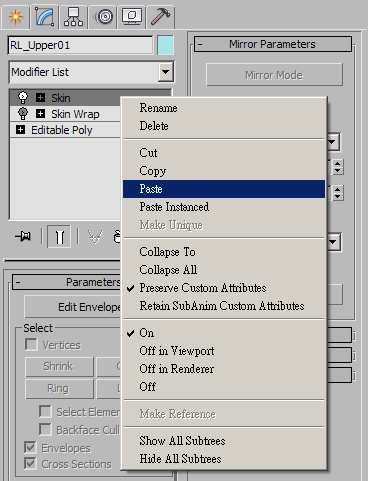
-
Check to make sure that the settings in the Mesh Select of the RL_Upper01 follow the naming and vertex number regulations.
-
If the data is correct, delete the RL_Upper, RL_Upper_cloth, and RL_Upper_Plus.
-
Rename RL_Upper01 to RL_Upper.
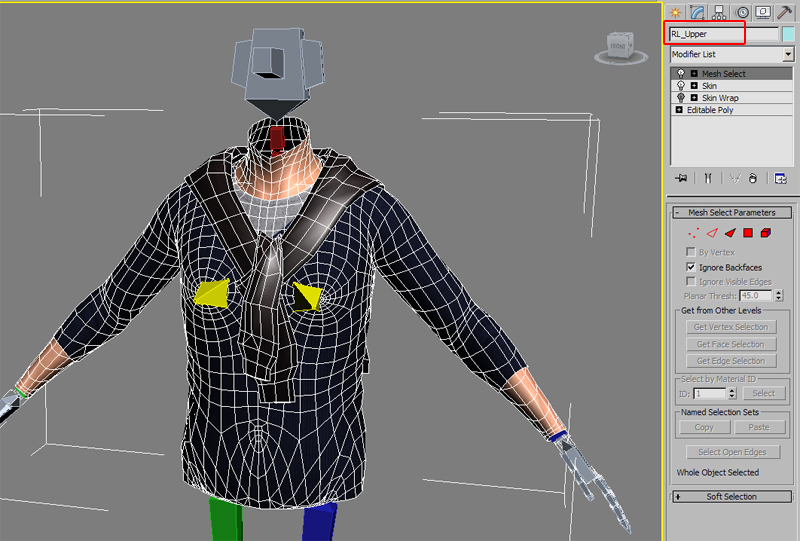
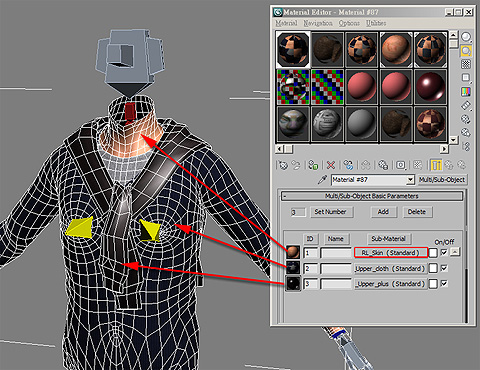
Checking the Materials
-
Select the new mesh named RL_Upper.
-
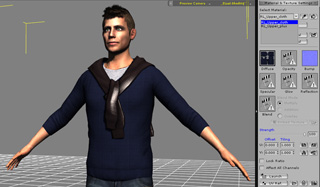
In the Material Editor, confirm that the RL_Upper contains multiple materials. Please make sure that the material for the skin is named RL_Skin. The names of the other clothes is arbitrary.
-
Export to iClone 5 and confirm the results of your new clothes.
|
Note:
|
|
You can follow the steps above to create new meshes for the RL_Lower, RL_Hands, and RL_Shoes and completely customize the clothing of any G5 character.
|