So you want to have a
super hero character?! No problem! In this lesson, you will be able to
learn how to add performs to your characters as well as learn the
difference between locking and unlocking performs- basically if you want
to allow interruptions within your animation sequences or not. We will
also learn more about setting hotkeys and about sample transform.
In this lesson
we will focus on how we can create perform commands and assign motion clips to
the character. Once an animation clip is assigned to the selected perform
command. You can then set "lock perform" to the command in selection to
deny any other perform commands from interrupting. How will this affect our
performance in Director Mode? When you use the hot key in Director Mode it
ignores any hot keys you pressed and continues the performance until its last
frame. Only after the animation is complete will it allow another hot key
animation to be performed. When it comes to unlock, the character's
motion would be allow other animations to interrupt the sequence by pressing
other hot keys.
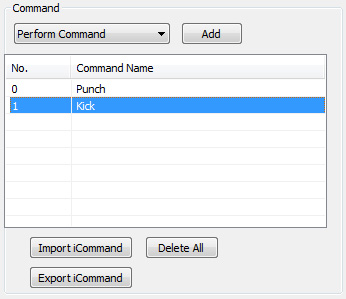
- Select "Perform Command" from the Command drop
down list.
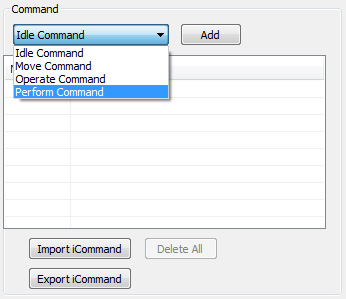
- Click "Add".
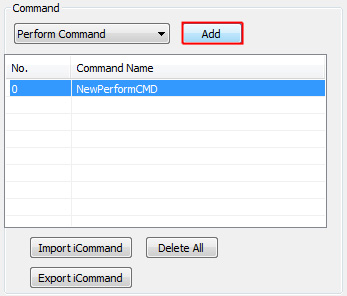
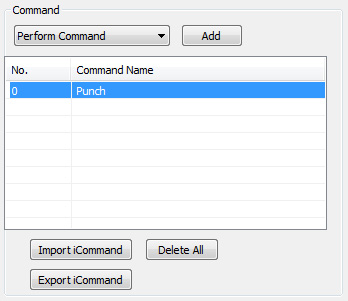
- Double-click on "NewPerformCMD" to change the
name of the perform command to "Punch".
- Command Type and command name shows here when in
selection.

- When
you have the Punch command in selection you can decide whether you want to
lock other channels (Lock
Move, Operate, Perform). When one of the "lock" has been checked, it
will deny other channels from interruption.

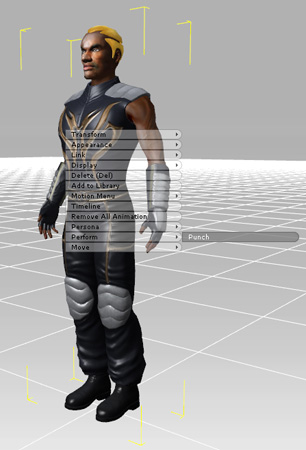
- Check "Right
Menu" when you want to see the command in the right-click menu.

- Select one of the
Hotkeys
to use it in
Director Mode. Please visit
iCloneWiki.com for the corresponding hot key definition.

- Now
that we created the Perform command, we need to assign the actual animation
that goes with the �Punch�. Select the Animation Clip from the
ClipSeq section.
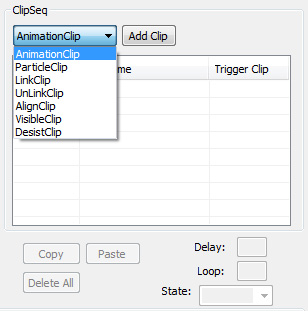
- Click "Add Clip"
 . .
- The Open window pops up, browse to the motion file
for your character. The default iClone3 folder is in "C:\Program
Files\Reallusion\iClone 3\Template\iClone Template\Motion".
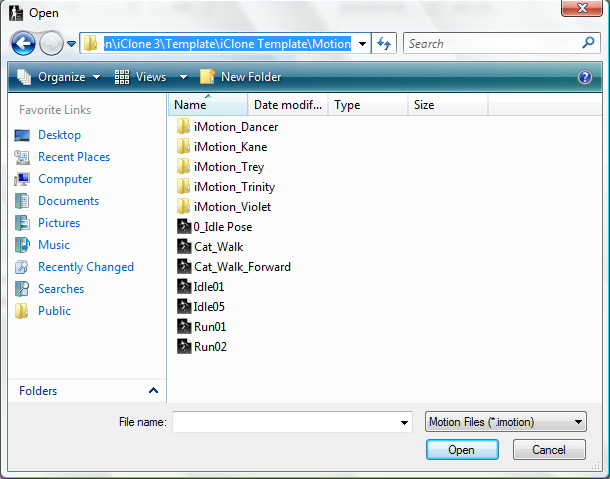
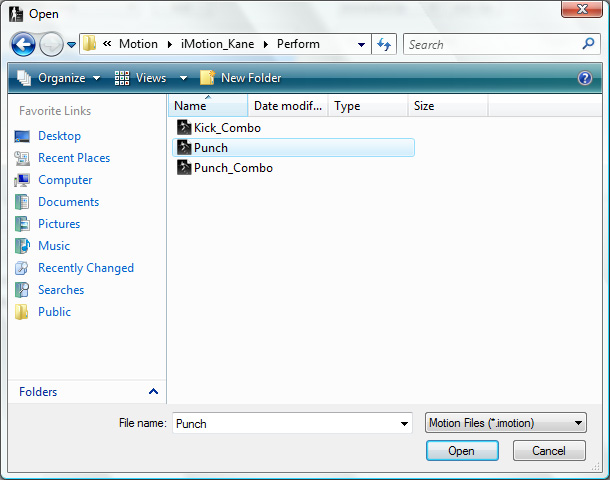
- Select Punch in Kane's folder. Click "Open".
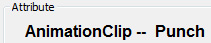
- Change the name of "NewAnimation" to Punch.
- Now the clip type and the clip name show in the
Attribute panel.
- Define
the Target Type as "Character". This does not mean the target
that will be punched is another character, but that the avatar himself will
perform the animation. Target Type will be discussed more in other lessons.

- If you want to change to another motion clip. Click
Browse in the
Clip Location section.

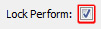
- Add another perform command and rename it "Kick".
- When
you have Perform Command -- Kick in selection. Check
Lock Perform to deny any other commands from interrupting the
animation of that kick. Sometimes interruptions are good; sometimes you want
an animation to be completed before the next animation. It is up to you
which you prefer while designing AML, you can see the difference between
punch (which allows interruption) and kick (which does not allow, because we
have locked perform).
- Check Right Menu to display your command in
right-click menu. Select one of the hotkeys for the selected command.

- Create another animation clip for kick command.
Rename it to Kick.
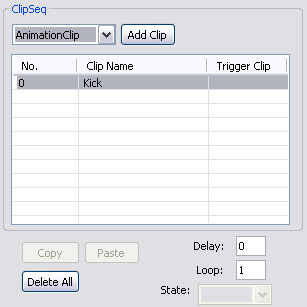
- Set
this clip's
Sample Transform to "Snap". Snap, lock actors
at its last translation and Z axis (height) to prevent
from being dragged back to the original root location after transformation
caused by perform commands.

- Browse to a new motion file for the Kick
animation clip.

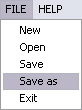
- After you have completed your AML Script. Go to File
> Save As to save the script.
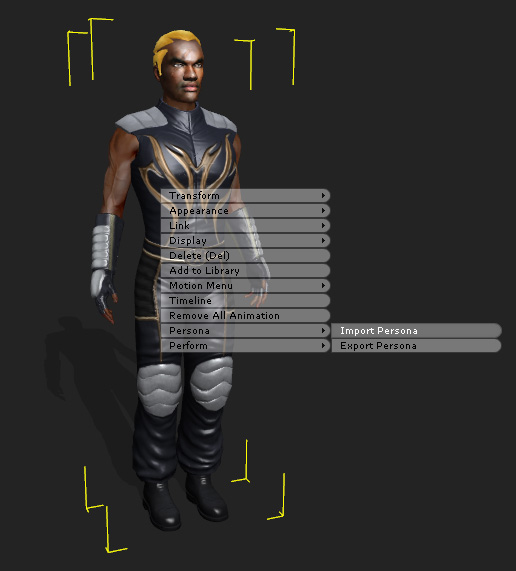
- In iClone3, right-click on the character to import
persona.
|