Find the Loop Interval
Since this lesson is about creating the loop motion and we have already done that. Let's play the animation and see if we can find a start pose and an end pose that are the same. Maybe some of you might ask, is that really necessary? The answer is "YES". Since we want to make a perfect loop animation cycle we must find an interval that will not make any jerky moves while looping the motion.
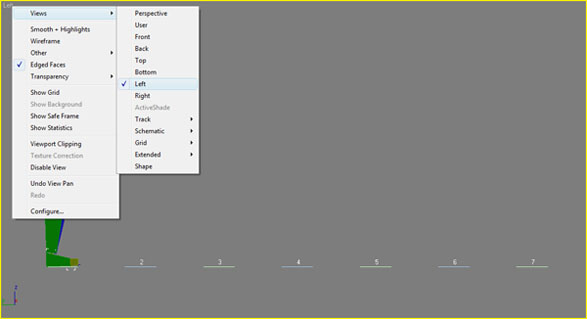
- Right-click on the location of "Left" or press "L" to change the viewport to the "Side" view.
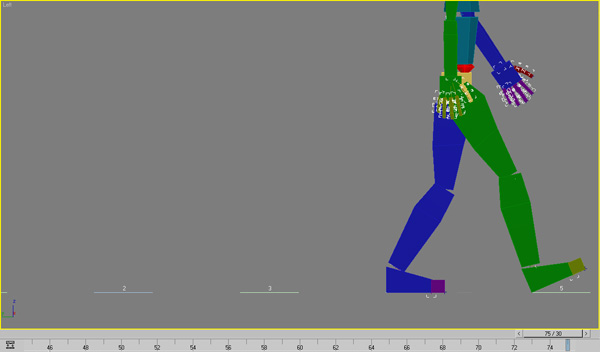
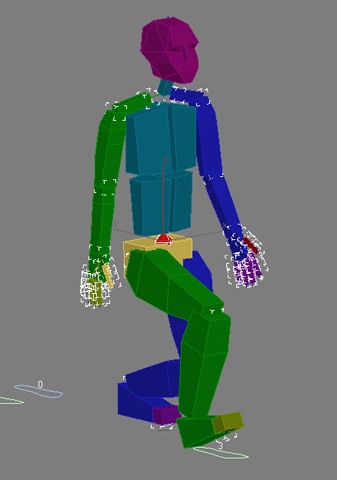
- Drag the Timeline slider and look closely to find an interval of the walk loop. The start frame "45". Catch the part where the first touch that the heel touches to the ground.

- The second step that is hitting the ground at frame "60".

- Last, the end frame that hits the ground. After you have find the last step you may notice that you have a loop of walk at frame "75". Where the heel hits the floor.
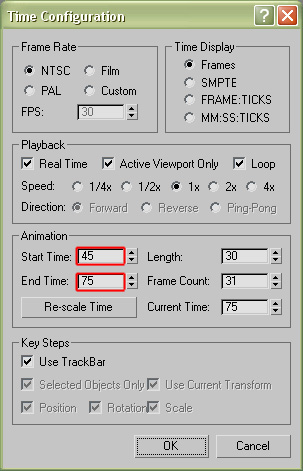
- Set "Start/End" time to preview the loop of the walk.
- Scroll through to find the "+Modes and Display" section and expand the section.
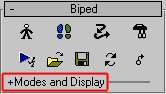
- Click on "In Place" Mode to make the character go through the keyed actions without moving the character. By doing this the character walks at a location to create a loop cycle.

Motion Layer
It's pretty dull when a character walks in a loop motion but with no personalities to it. Let's give life to the character by using the motion layer technique in 3ds Max.
- Have the biped selected and expand the "Layers" rollout on the Motion panel.
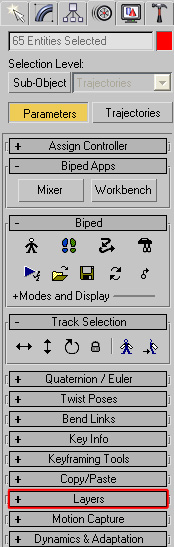
- Click on "Create Layer" to create a new motion layer and rename the layer if you wish to.

- The "Retargeting" section becomes available when the current layer can take in the IK constraint of the base layer for the body part. After you have activate the section and clicked on one of the retarget parts.
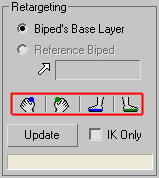
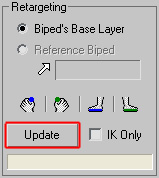
- Click "Update" to apply the retarget parts.
- Click the "Auto Key".
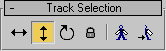
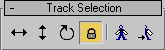
- On the "Track Selection" rollout. Click on the "Body Vertical" to select the biped's center of mass.
- Move the pelvis of
the biped down. Oh NO! My legs are crashing into the ground. No
worries! Just select both feet and click on "Retarget Left Leg"
 and "Retarget Right Leg"
 . This
will move both feet onto the ground.
. This
will move both feet onto the ground.
- To avoid deselecting, you can active "Lock COM Keying" button. When this button has been activated you can have the target object in selection during the whole animation procedure.
In addition to modifying the pelvis height, you may add motion layer keys to adjust the movement of head, spines and other limbs to achieve a more stylized walking motion.
Create Walk Loop - Character Studio Pipeline
- Prepare the Biped
- Find the Loop Interval
- Export the Loop Walk
- Apply the Motion