Start with the Rigging
What’s important about good rigging? Well… When you have good rigs you can have fun animating without running into troubles. Things to remember before you start with this building process. Do not activate mirror when building skeleton.
Why is that? When it is applied, iClone will scramble Donkey’s IK & Mirror mechanism and the axis will change.
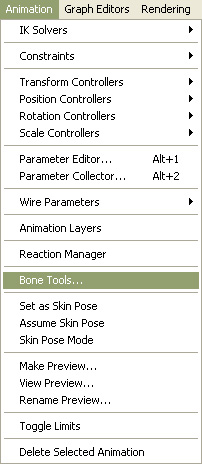
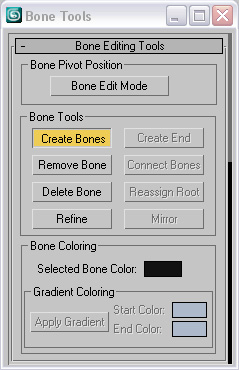
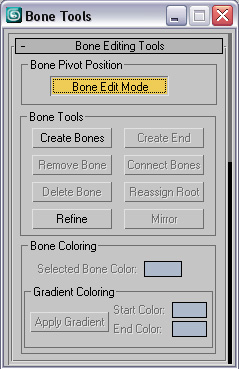
- To start creating the bones. Open “Bone Tools” floater under "Animation" menu bar.
- Press the “Create Bones” button to create the bones for the Donkey. Click in the viewport to create bones. Right-click to end bone creation.
Note: In 3ds Max 8, "Bone Tool" is under "Character" menu.
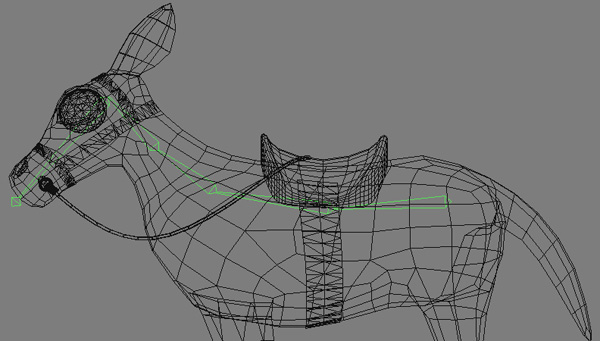
Procedure in creating the bones for Quadruped
Let's start to build the bones for quadruped, the Donkey.
- First, start from the
hip bone to construct the whole spine for the Donkey.
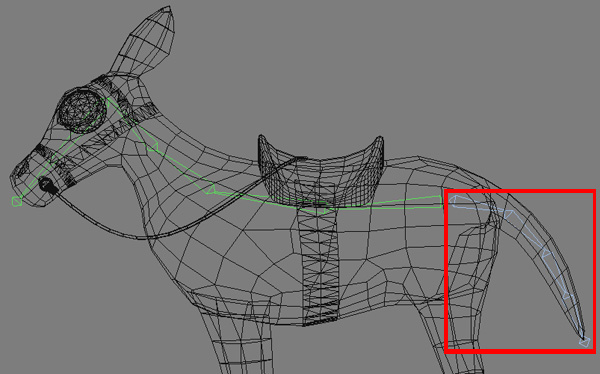
- Create tail bones. Starting from the opposite direction of the spine bone.
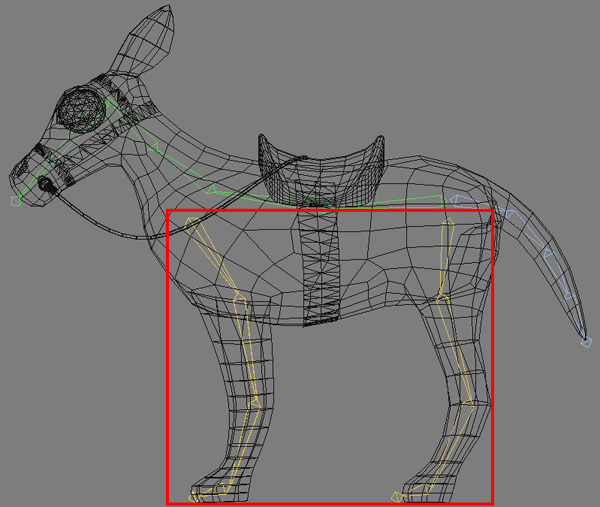
- Create leg bones. You may create the bones of one leg and copy them for another side. Please remember that we do not recommend using mirror for leg bone building.
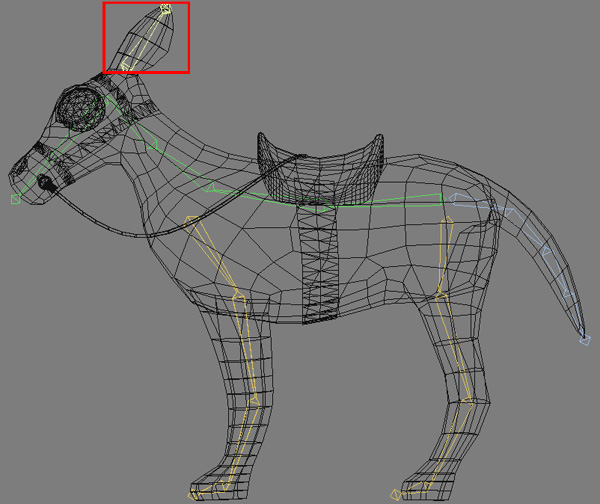
- Add one more sets of bones for the Donkey ear. Here is the complete Donkey's bone structure.
Adjusting Bone Structure
- Activate "Bone Edit Mode". This function
allows you to adjust the bone
position by using only the "MOVE" tool in 3ds Max.
Connect Bones
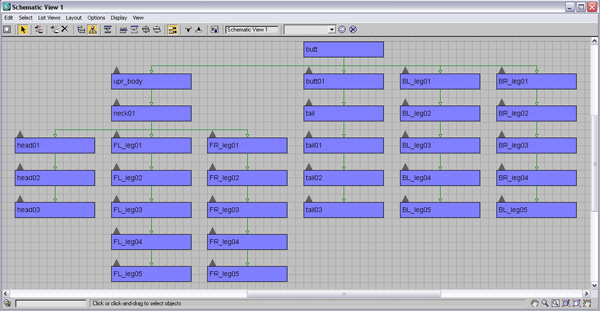
- Open “Schematic
Window”
 floater.
Rename all the bones for the Donkey.
floater.
Rename all the bones for the Donkey.

- Use the “Connect”
button
 to connect all
the bones to “lwr_body (butt)” bone and make it as the parent to all the bones.
to connect all
the bones to “lwr_body (butt)” bone and make it as the parent to all the bones.
Skin the Donkey Model
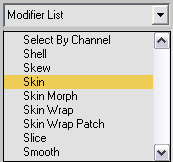
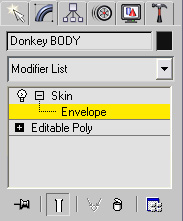
- Select the Donkey model. In the “Modify” panel, select “Skin” in the “Modifier List”. This applies the skin to the Donkey.
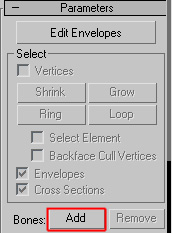
- Click "Add" bones in the “Parameters” section to open the "Select Bones" dialog box. Add all the bones constructed earlier.
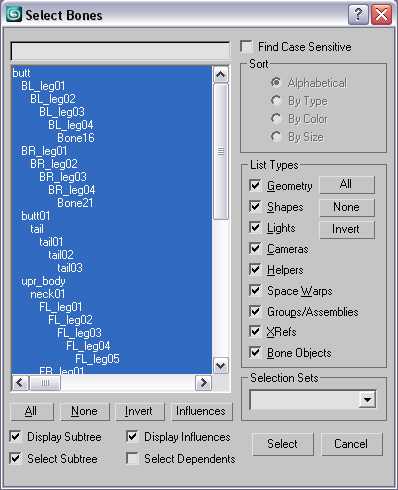
- Select all the bones constructed earlier, and click "Select" button.
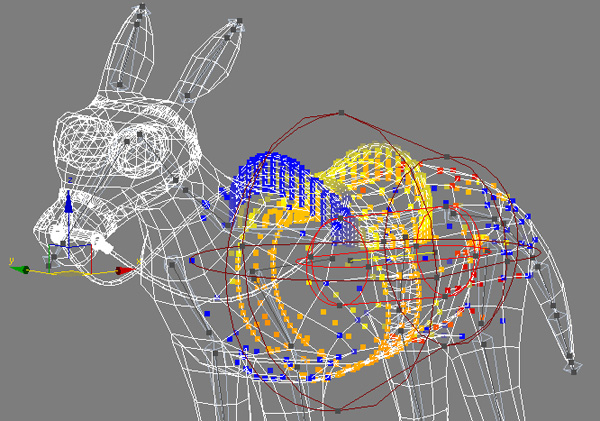
- The next step is to adjust envelop to the Donkey. Select "Envelope" sub-control under "Skin" modifier, then select the bone from the bone list or click on it in the viewport to edit its envelope.
- Adjust the bigger area of the envelope by adjusting the capsule shape envelope pair. The inner envelope influences the vertices up to fullest value. Whereas that the outer envelope influences the blending between the two bones.
- Now
that we have set the envelopes, the next step is to check and fine-tune
the skin weight.
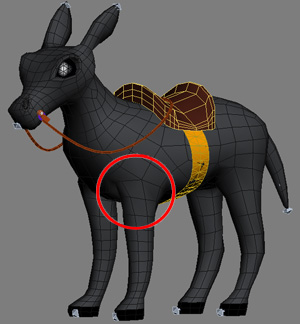
One way to check if the vertex weights are set properly is to pose the donkey with some poses.
 |
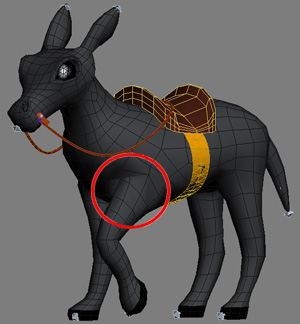 |
| Default Pose | Check Pose |
There are several ways to fine-tune Skin Weight in 3ds Max:
- Click the “Vertices” checkbox, then select the vertices you would like to weight.
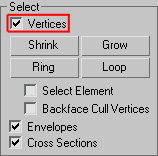
- Including and excluding vertices are handy buttons which allows you to remove or include the selected vertices from those being affected by the selected bones.
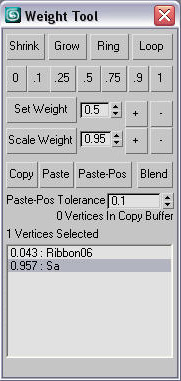
- Combining with “Weight Tool”
 envelope can becomes
an easy thing to do. How do you do that? Select some points you want to adjust
the strength to certain bone. Then, adjust weight value to the points in selection.
envelope can becomes
an easy thing to do. How do you do that? Select some points you want to adjust
the strength to certain bone. Then, adjust weight value to the points in selection.
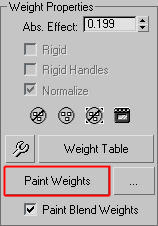
- Use the “Paint Weights Tool” to brush on weights for the selected bone.
Create Non-Human Character
- Prepare the Model
- Start with the Rigging
- Export the Model