Merge RL Bones to the Character
RL Bone is made just for iClone which allows you to apply both motion and persona. May some of you might ask. Can I use “Biped Skeleton” instead of “RL Bones”? Actually you will not be able to load the character, because iClone does not recognize CS Bone System from 3Ds Max. Let us start from getting the RL Bones.
- Download RL Bones right from https://developer.reallusion.com/docs_ic.aspx#Plugin. You must become an iClone Premium CCD Member before you can download the Max Template file.
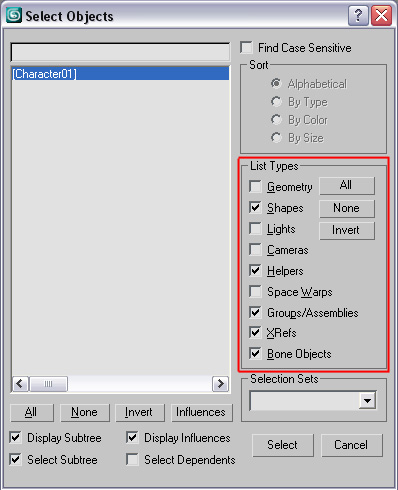
- Go to File > Merge > Select “Full_Template_Female”. This template contains all of the geometric structures of the G1 Character (also applies to G2 and G3 Characters). Check off all the unnecessary “List Types”.
- Maybe some of you have realized that the material on the character has disappeared.
- No problem. Just redirect the material path for your character. Go to “Utilities” in the right side panel. Have “Bitmap/Photometric Paths” selected.
- Click “Edit Resources” in the “Path Editor Section” to redirect your material path.
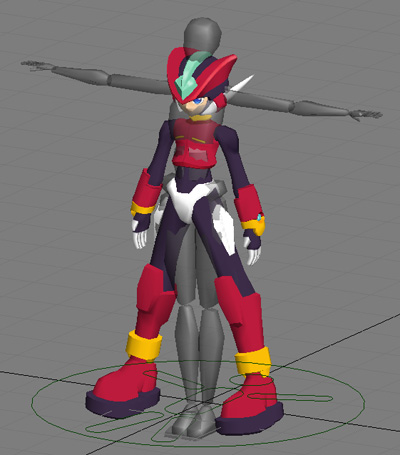
- Merge RL Bones and the Character in one single Scene.
Align RL Bones to the Character
Alignment is an important factor which may cause the character not to move properly. This may lead to mesh crashing problems when animation is applied.
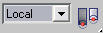
- Make sure Reference Coordinate System is “Local”; this allows the orientation of the object to turn at the center of the selected body parts.
- Use the Pivot Point
Center
 to align
both RL Bones and the Character.
to align
both RL Bones and the Character.

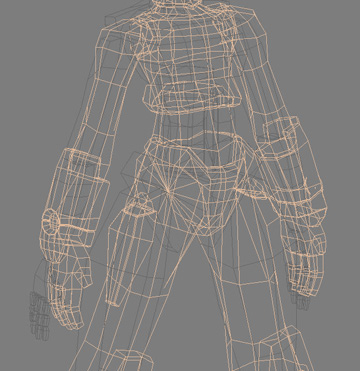
- Scale and rotate the RL Bone to match with the character’s mesh.
- Align the root bone "LowerTorso" first then the child bones
- Only "LowerTorso" can be moved
- Don not rotate "LPelvis'" and “RPelvis".
- Make sure the positions of the body parts are well aligned.
Create Non-Standard Character
- Prepare the Model
- Merge RL Bones
- Apply Skin
- Export the Model