Export the Model
We are now all set with the model in 3Ds Max. Let us export the model and see how well the model works with iClone3.
How to Export?
- Make sure you have download iClone3 Plug-in from Developer Page from Reallusion Inc. https://developer.reallusion.com/docs_ic.aspx#Plugin
- Install the Plug-in manually
- Place the “RLMaxExp” folder and “iClone3MaxExp.dle” file into 3Ds Max’s “plugins” folder.
- Place “IMGRT.dll” in 3Ds Max root folder.
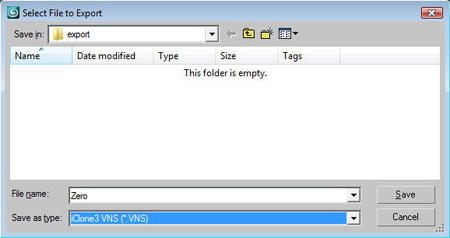
- Go to “File > Export” in the menu bar. In the “Save as type” dropdown list please choose “iClone3 VNS (*.VNS)”.
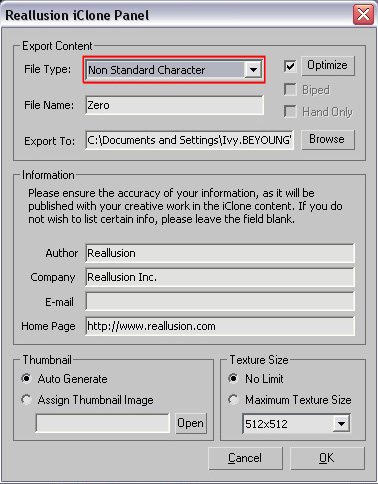
- Reallusion iClone Panel pops up for you to set the setting for the file. From the “File Type” dropdown list please select “Non-Standard Character”. Click “OK”.
Launch up iClone3 and apply a motion to the Character.
- Click “Actor” Tab and then “Import” in the modify panel to import *iAvatar files.
- Here is my Character in iClone3. Apply “Persona” to the character.
- Try out the persona in director mode. You can also apply animation to the character.
- When you are satisfied with the character you can add Zero to "Content Manager" in iClone.
Download: *iAvatar
Create Non-Standard Character
- Prepare the Model
- Merge RL Bones
- Apply Skin
- Export the Model