Bounding Mesh for a Prop
This section will cover creating a Bounding Mesh for a free prop downloaded from TurboSquid.
Download the prop file here.

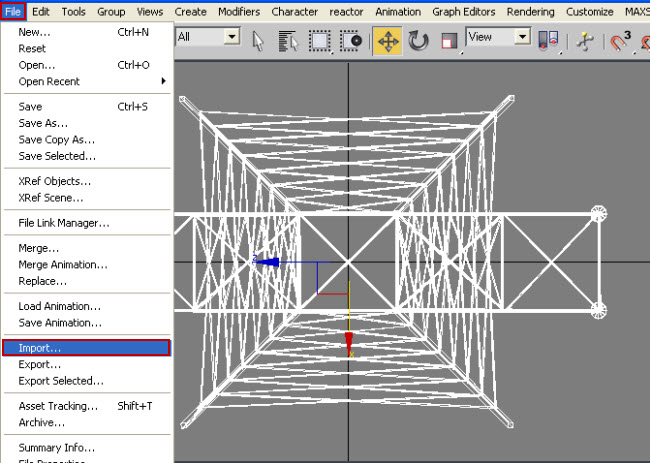
2. Import the prop into 3D Studio Max
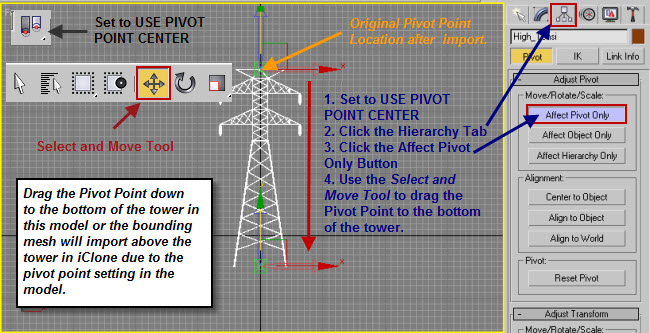
3. Move the Pivot Point of the Tower mesh down to the bottom of the tower. This may not be a problem in all downloaded meshes depending on the application it was created in and where the pivot point was when the mesh was exported from that application. This mesh is used as an example to demonstrate that this pivot point problem may occur in certain downloaded 3D meshes and will need to be corrected to function properly in iClone.
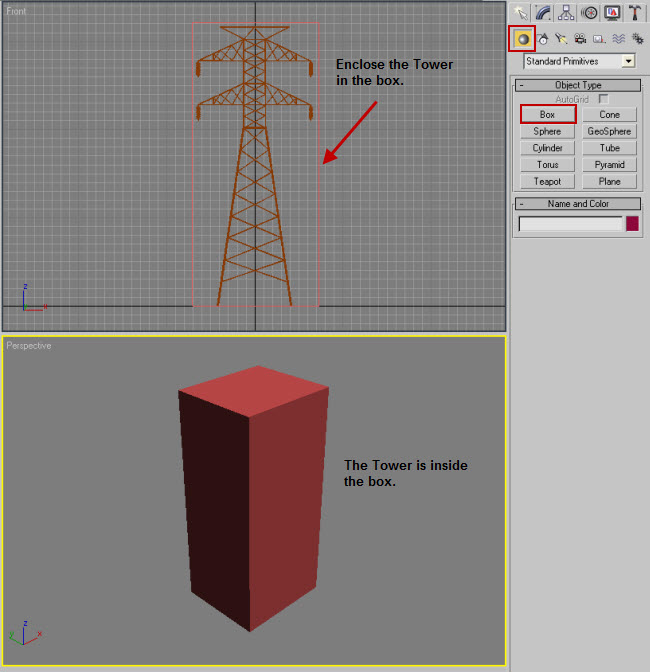
4(a). Create a box that encloses the tower. The Bounding Mesh will usually be less polygons than the mesh it bounds around.
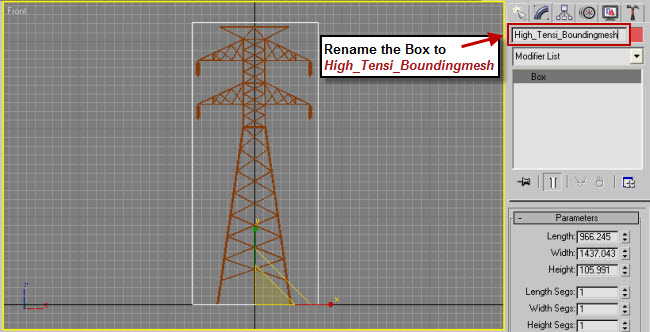
4(b). Name the box High_Tensi_Boundingmesh because the tower is labeled as High_Tensi in the model or change the tower mesh label to whatever you prefer but you must name the bounding mesh as Name-of-Mesh_Boundingmesh for the bounding mesh to function properly in iClone. This is a required step.
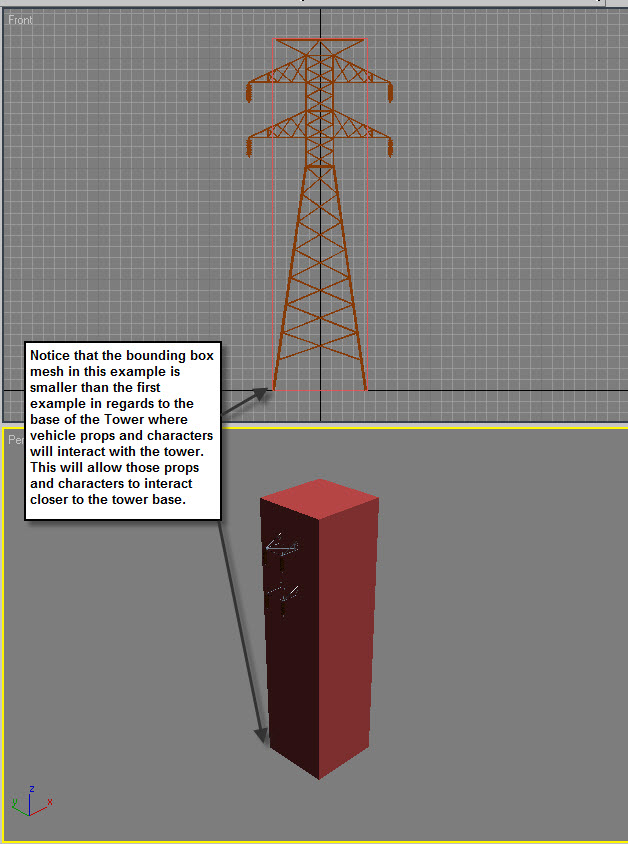
NOTE: If you do not create a bounding mesh for the model then iClone will create its own bounding box but you can control the interaction of the iProp or character by making your own bounding box or other bounding mesh that is constructed and sized in a manner more appropriate to the prop mesh. If you want your character to walk closer to an object before turning or stopping then you can do so by creating your own bounding mesh that is created closer in proximity to the boundary of the prop mesh. Later in this whitepaper you will be shown an example of a different type of bounding mesh for the same tower object.
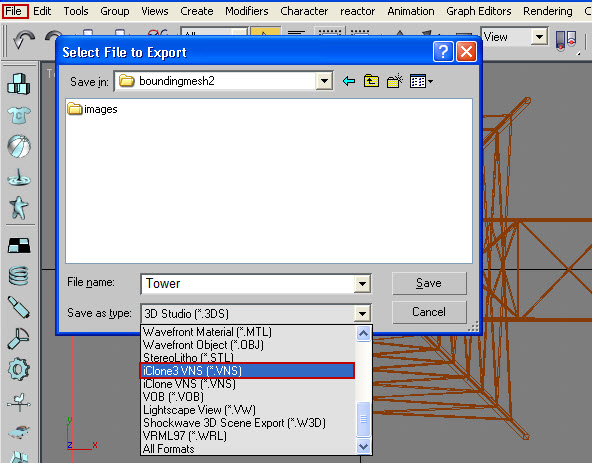
5. Select File -> Export then enter the filename and select the iClone 3 Plugin as the file type:
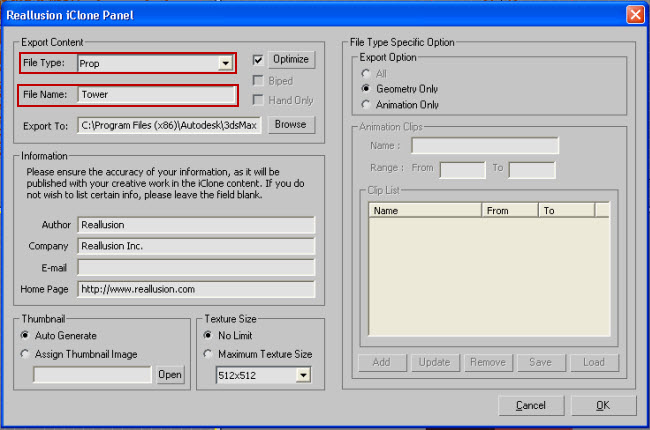
iClone 3 Max Plugin Export Interface:
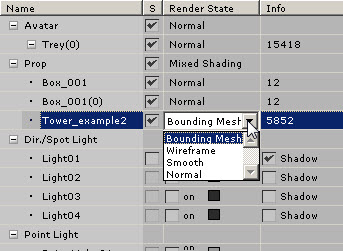
Check Bounding Mesh in iClone:
You may check the Bounding Mesh Box of the selected prop in iClone's Scene Manager by switching the Render State mode.
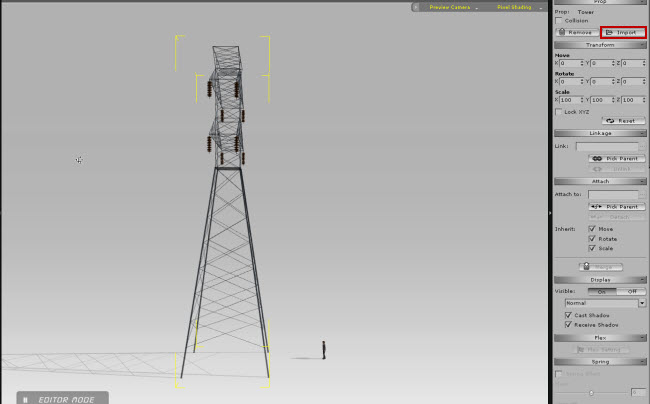
6. Import the mesh into iClone by selecting the Set tab ![]() ,
Props button
,
Props button ![]() and then the import button::
and then the import button::
Results of walk test with collision box 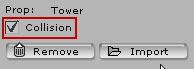 checked:
 |
Note that the character may stops or go around in a big circle to get to the desired location. |
| Bounding Mesh Mode | Normal Mode |
Download: Tower01.iProp
Alternate Bounding Mesh Box Example before export from Max:
Results of Walk test with alternative bounding mesh (be sure to check the collision box):
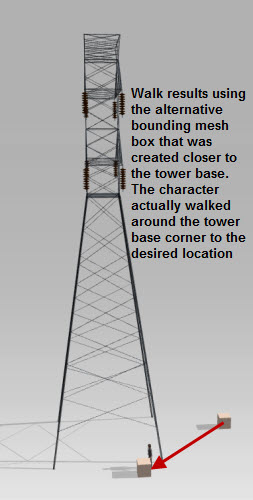 |
Note that the character now walks to the desired location turning the corner around the Tower base. |
| Bounding Mesh Mode | Normal Mode |
Download: Tower02.iProp
As you can see the character or iProps will interact differently with different designed Bounding Meshes. You also use multi-side meshes such as octagon and other multi-side simple shapes. Remember to keep the bounding mesh as simple as possible when creating it within Max.