Character Studio can be used as iClone3 motion
creator. Since we are exporting the motion into iClone3, we will
need a biped skeleton with the similar
structure as iClone characters.
Where to get Character Studio (CS) Bone?
It's not a problem to
download Biped Skeleton that fits right into iClone3. Just go to our developer
page on Reallusion website and click to download, "https://developer.reallusion.com/docs_ic.aspx".
Well... I am in the developer's page now. Where is it?! Don't worry...
I'll guide you to the location.
Once you are in
the Developer Page. Go to the "3D Studio Max complete Developer
Guides"
section.
Download the
file in "Sample files for iClone 3.0".
Note: Before you can
proceed into the download section. You must be an "iClone Premium CCD
Member". How to become a CCD Member? Well...
all your answers are here: "https://developer.reallusion.com/default.aspx".
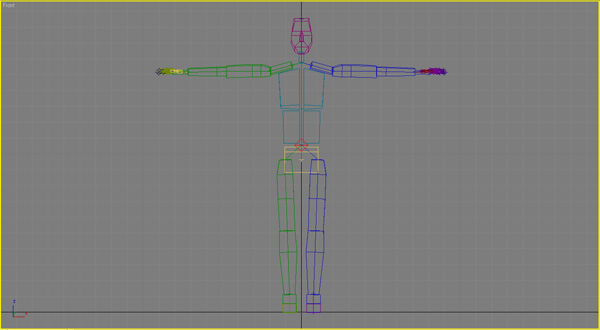
Import iClone Biped Skeleton
Reallusion produces all
avatars' motion by using the definition built within iClone compatible Biped Skeleton. This Biped Skeleton is well aligned with
iClone G3 characters no matter what scale or size.
Load iClone
compatible Biped Skeleton
that you have downloaded from the developer's page.
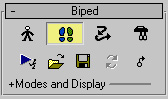
Select the Biped
Skeleton and turn on "Motion Tab" on the
right side panel.
Scroll down to the "Biped"
section to activate "Footstep Mode" where you can create
footsteps path for the biped to follow.
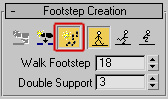
Scroll down to
the "Footstep Creation" section to activate "Create Multiple
Footsteps". This will automatically create multiple footsteps that
are equally spaced. This pop up menu lets you select which foot is
the first priority to step out.
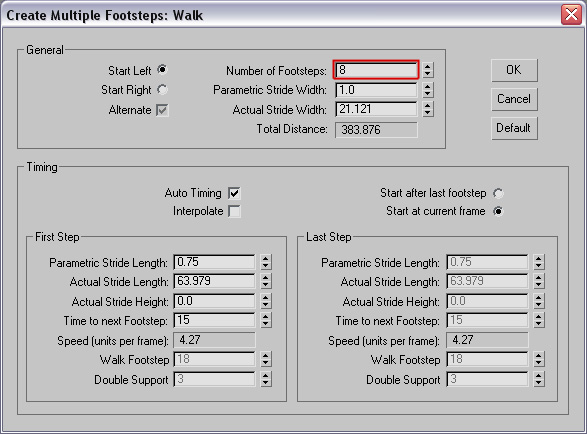
"Create Multiple
Footsteps" menu pops up. How many steps do you want your biped
to go? Decide this all in this pop up menu. From this menu you can
set all sorts of things. In this tutorial we will set the "Number
of Footsteps" for the biped.
Once all the settings
are set. Click "OK" to confirm. Wow! Here are the steps
created.
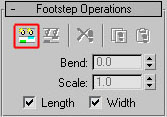
Click the "Create
Keys for Inactive Footsteps" button in the "Footstep
Operations" rollout to create the keys for the biped to follow.
After the keys are created, the biped is moved to the location of
the first footprint.
Notice all the keys on the Timeline? That's the result after applying the "Create
Keys for Interactive Footsteps".
Dragging the Time
Slider and the biped will move through the available footsteps.