Explosions are fun,
right!? Hard to control the timing of explosions, though! And it�s also hard to
switch the explosion to the smoke of the burning debris� Did I hear someone make
a wish for an easier way to control particles� Well, in this lesson your wish
has been answered! You will learn how to set hot keys to control your particles
and to switch between your particles as well.
In this
lesson we will show you how to turn on particle effects, play multiple effects
with arranged sequences, play several effects at one time, as well as how to
turn them off using Visibility Clips.
Preparing the Effects
Settings in iClone
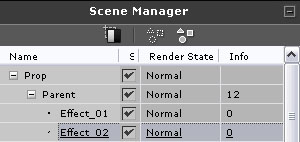
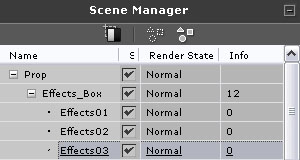
- Add a box as the control center, i.e.,
the parent node to place the AML code
- Add in 3 effects and name each effect.
- Attach to the parent box.
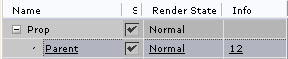
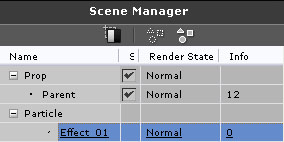
- In iClone3, go to Set > Props
and add a box into the scene. This box will be the parent of all the
effects. Rename it to "Parent".
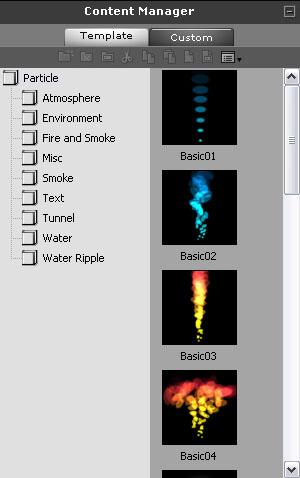
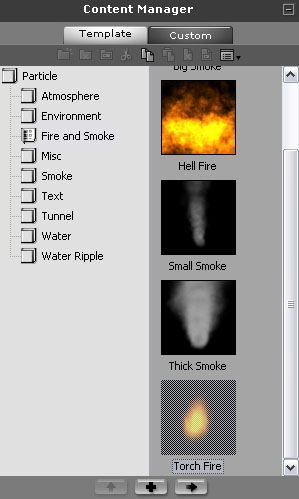
- Go to the particle tab
 . .
- Select one of the effects. In this
tutorial I will select "Basic02".
- Rename the effect to "Effect_01".
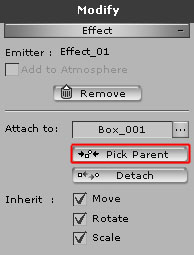
- Go to the effect section under the
particle modify panel. Click "Pick Parent" and attach the effect to
the box "Parent".
- Adjust emitters in the particle setting panel.
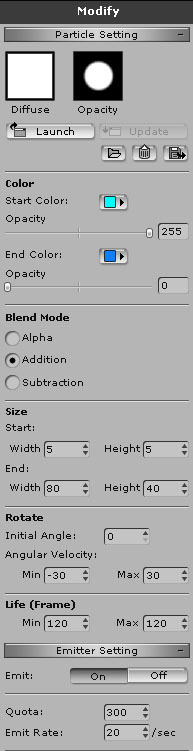
If
you want to know more about how to adjust particle settings please visit
Adjusting
Emitters.
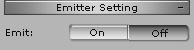
- Set the emitter "Off" as initial state. This
way you can turn it on from AML Script.
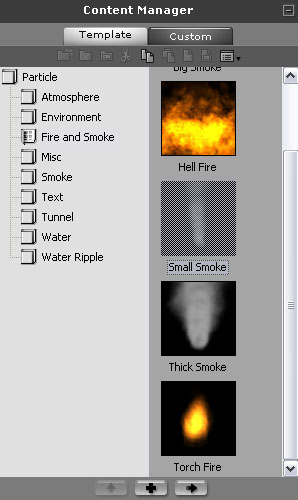
- Add another effect (Torch Fire) to the scene.
Name the effect "Effect_02"
- Attach the "Effect_02" to the Parent
and adjust the settings of the particle.
- Add one more effect to the scene. Name it "Effect_03".
- Attach Effect_03 to the parent and adjust the settings of the
effect.
- Remember to set the emitter "Off".
This way you can control each effect from AML Script.
AML Scripting
Let us give you a little preview about how the particle
AML script works.
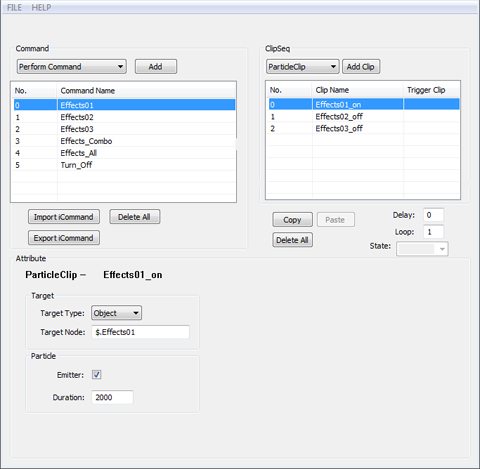
In the command section, you can see 6
different perform commands.
| Perform Command
Name |
Setting |
Effects01
Effects02
Effects03 |
ParticleClip
Turn on individual effect 01-03
Set the target one ON, and two others OFF |
| Combo |
Set the sequence of particle clips. |
| Effects_All |
Turn on all the effects. |
| Turn_Off |
Turn off all the effects. |
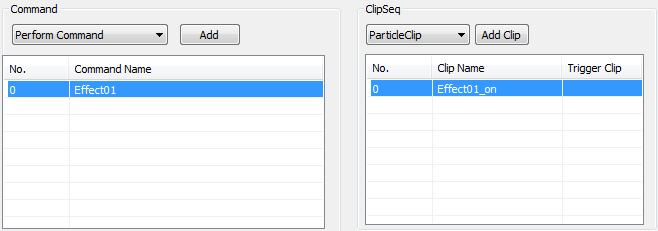
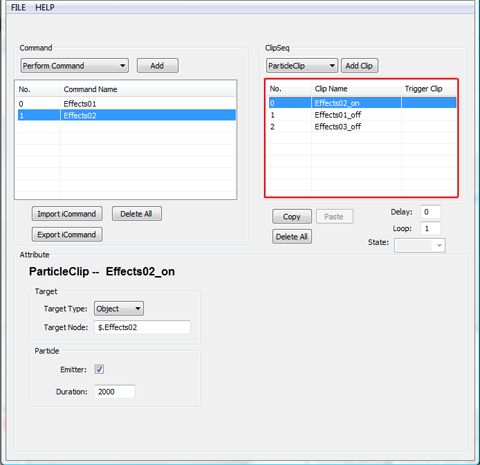
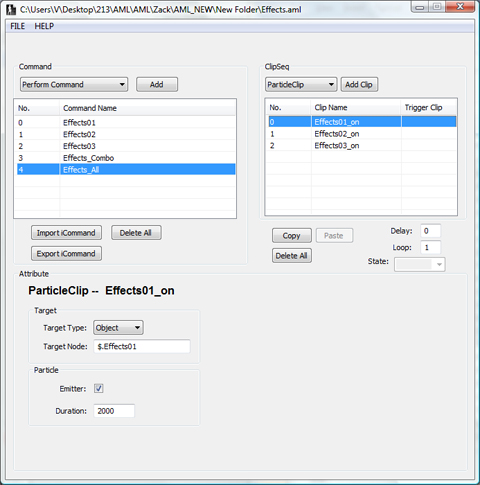
- Add a "Perform Command" from the command drop
down list.
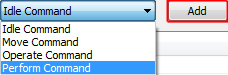
- Rename the command to "Effect01" where this
command controls on/off of the"Effect01".

- Check "Lock Move" and "Lock Operate".
This will lock both Move and Operate command from interrupting while this
command is proceeding.

- Check "Right Menu" and assign hot key "Perform1" for this effect.

- Go to the ClipSeq section. Select
Particle Clip
to set clip attribute for Effect01. Rename the clip to "Effect01_on".
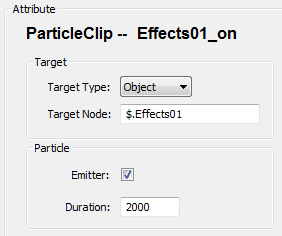
- When Effect01_on is in selection. Go to the
clip's attribute section and select "Object" for Target Type.
- Set the Target Node of the effect. The node should be
in the name of the parent symbolized as "$" and followed by
the child name ".Effect01".
The complete format is "$.Effects01".
- Check the "Emitter" to ensure that the effect
is active.
- "Duration" sets the length of time
(m/sec) for the effect to run once it emits. Let's set it "2000".
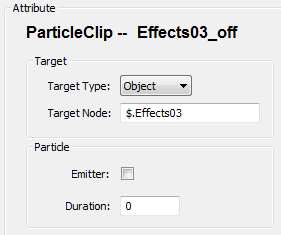
- For the same perform command, Effects01, add another particle clip to set the effect OFF for effect02.
Rename the particle clip "Effect02_off".
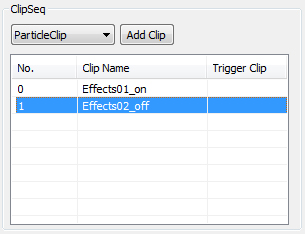
- Go into the attribute section and set attributes for
the selected particle clip.
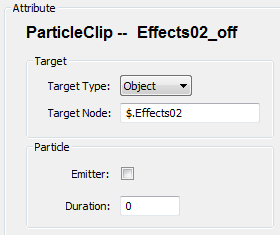
- Choose "Object" as the target type.
- Set target node: "$.Effects02".
- Since we are setting the effect02 OFF remember
not to check the "Emitter".
- Add one more particle clip and set effect OFF for
effect03.
- In the perform command, add two more perform commands
to set each effect02 and effect03 ON. Set hot keys for each command.
- Set Effect02 ON. Effect01 and effect03 OFF.
- Set Effect03 ON. Effect01 and effect02 OFF.
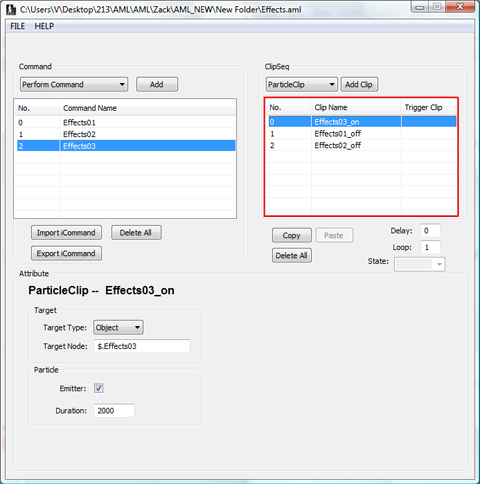
Effects Sequence
- After you have set ON/Off for each of the effect. Set
a perform command that triggers the effects in sequence. Name the perform
command "Effect_Combo". Set the hot key for this command.

- Add a particle clip for the Effect_Combo
command.
- Name the clip "Effect01_on".
- Set the attributes for the Effect01_on clip.
| Target Type: "Object" |
This defines that the particle clip is applied to
an object. |
| Target Node: "$.Effects01" |
This defines which effect that the particle clip
is going to be used on. |
| Emitter: "Checked" |
When checked the particle emitter
has been turned
on. |
| Duration: "2000" |
Sets the length of time (m/sec) for this particle
to emit. |
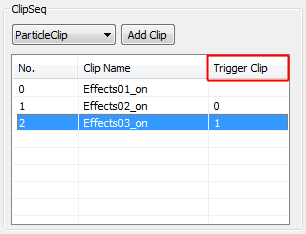
- Add two more "ON" particle clips for Effect02, Effect03 for the Effect_Combo command.
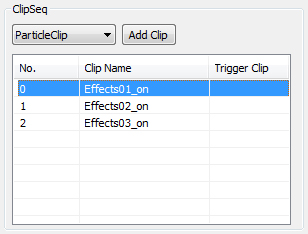
- Set Trigger Clip for each effect to have all
three clips play in sequence. Insert "0" in the trigger clip of
Effects02_on for the Effect02_on to play after Effect01_on. Insert "1"
in the trigger clip of Effects03_on for the Effect03_on to play after
Effect02_on. Once the hot key
y has been
triggered for Effect_Combo command the effect
now plays in order: Effects01_on > Effects02_on > Effects03_on.
Set All ON/OFF
- Add another perform command to set all the effects
with the emitter ON.
- Add three particle clips for the Effects_All
command. Have the identical settings as the Effect_Combo command
clips. But the
major difference is not to set any trigger clips. Now when you press the hot
key in iClone all the effects emit simultaneously.
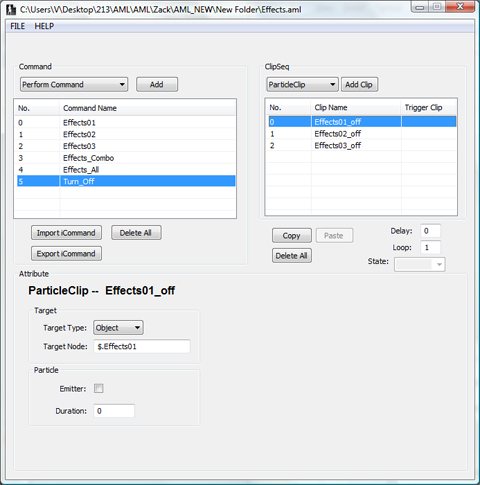
- Since we have included an effect to turn on all the
effects. Now, add a perform command and name it Turn_Off. Assign a
hot key to the command.
- Add three particle clips and rename them as "Effect01_off,
Effect02_off, Effect03_off ". Set all of these clips with "Emitter"
checked off.
Create special effects in the controls of your hands.
|