For
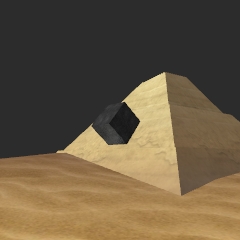
this lesson, we will pick up a soda can, and then casually drop it on
your nice clean rugs. In this lesson, we will learn how to give operate
commands as well as linking and aligning objects that are to be picked
up. Set the range for the action to be triggered (action radius)
and drop it anywhere in the room.
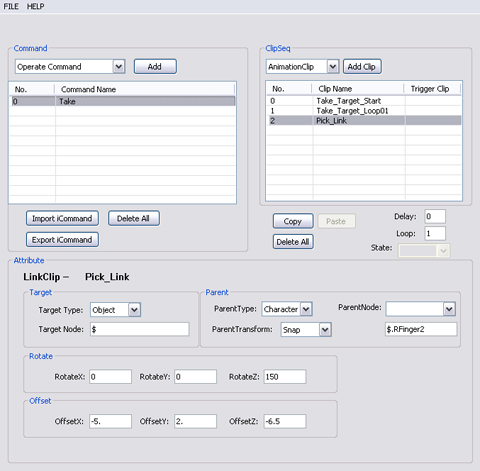
In this
tutorial we will focus on the link and unlink to an object. When a
character is grabbing an object the character holds the object in hand.
In this case we will have a link from the hand to the object. When a
character wants to drop the object from the hand. The character needs to
set an unlink to tell the object not to move with the hand. Is that all
to this lesson? No, theres more
We tell the object to leave our hand
but we did not tell the object where to go. In this case we need to add
an align clip to tell the object to drop onto the ground.
Grab
-
Since this is the
interaction between the character and the prop. We need to create
two operate commands for the grab and drop activities. Create an
Operate Command. Rename the command to "Take".
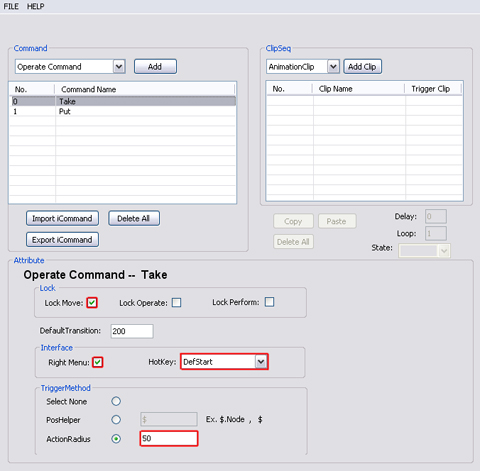
-
Lock Move: The
real meaning of lock move is that when you are proceeding with
this operate command you denies all Move command from
interrupting. In this tutorial, the meaning of lock move would
be totally different from the other projects. What happens is
that when you do not set Lock Move for this command. When he
nearly reaches to the angle of the certain item, the character's
foot slide until he does the motion for grabbing the item. This
case really show how important to set lock move when using
Operate Command of a character and an iProp.
-
Right Menu: This
attribute shows the command in the right click menu.
-
Hot
key: When hot key is set to default this allow the
user to use ctrl-click on target object in Direct Mode when the
actor is in selection, this make the actor to do the default
interaction with the target iProp without the need to switch
between character and iProp.
-
ActionRadius:
This attribute defines the radius range, which the actor can
approach and start to play animation clips once he enters into this
range.
-
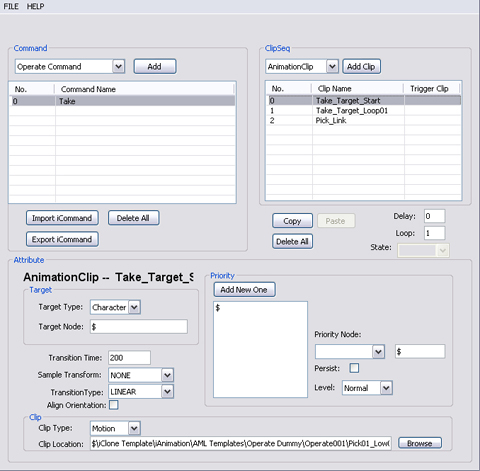
Let's talk about how the
animation clips have been broke down into parts. A motion that the
hand STARTS to pick up the object and another motion WHEN
picking up the object. So we have added two animation clips for this
command and one link clip to set link to the object.
-
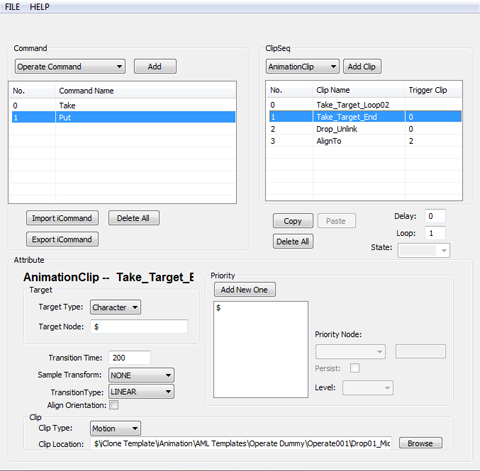
Set
Trigger Clip for the clips of the Take Operate
Command.

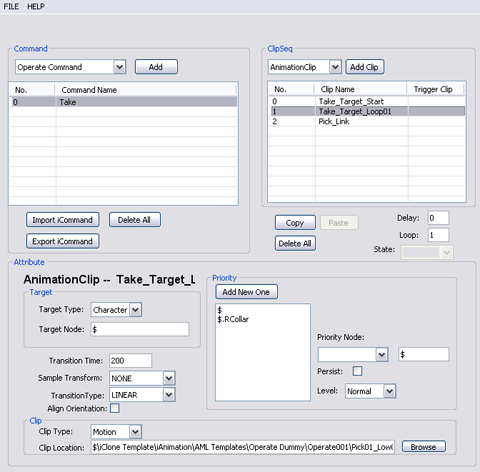
Let's think about how you would reach for an object. You will reach
for the object, taking and holding (link) the object. So, that is
what we need to know before placing our Trigger Clip numbers in the
column. No. 0 is the reaching for the object clip, so we
don't need to place any numbers for it in the Trigger Clip column. Since
it's the very first clip this taking motion starts. No.1
and No.2 are the two clips that will happen at the same
time. The reason for that is when the character takes the object you
need to set a link for the object to hold in hand. Insert "0" for
both of these clips for them to happen after reaching for the object,
No.0.
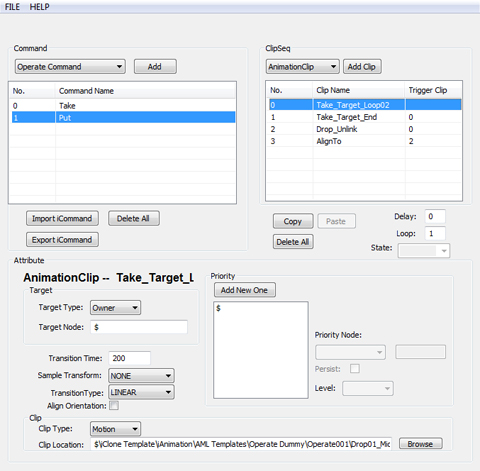
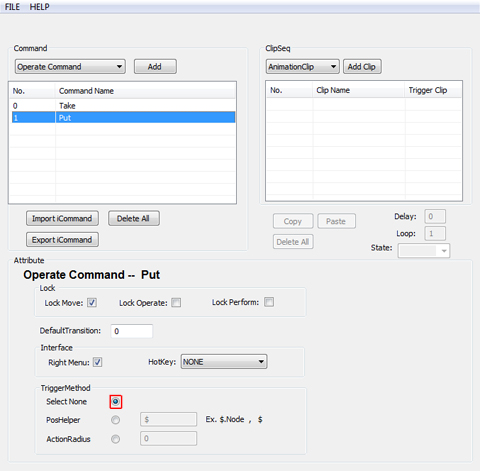
Drop
-
Create a Drop Operate
Command. Add an Operate Command as the settings in the Take
command but select "Select None" in the Trigger Method.
-
Create the clips for the
Put operate command. Same as the take command, put command has
divided into sections.
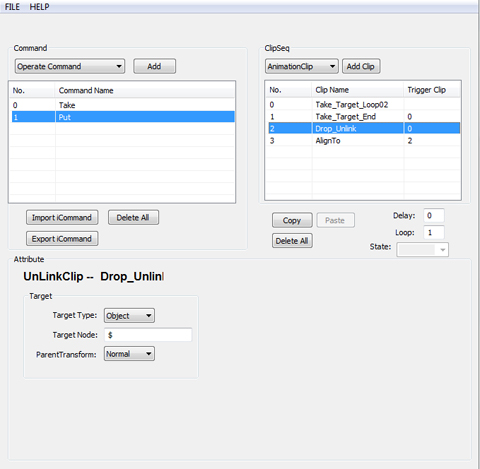
Noticed that the Target Type is set to "Owner". Owner
refers that you are the parent of an iProp. In this case, the character is grabbing an item in the hands, where the iProp is
linked to the character.
-
Unlink Clip:
Drop_Unlink
-
Align Clip: AlignTo
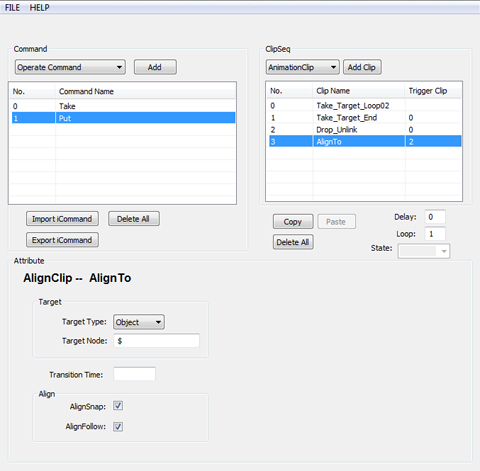
-
AlignSnap: When
an object is dropped onto the ground, this attribute
will align X, Y, Z to the ground.

-
AlignFollow: When an object moves, not only the Move X,
Y, Z of the object adjust automatically, but the
rotation of the X, Y, Z also adjust to match the angle
(normal) of the terrain.
-
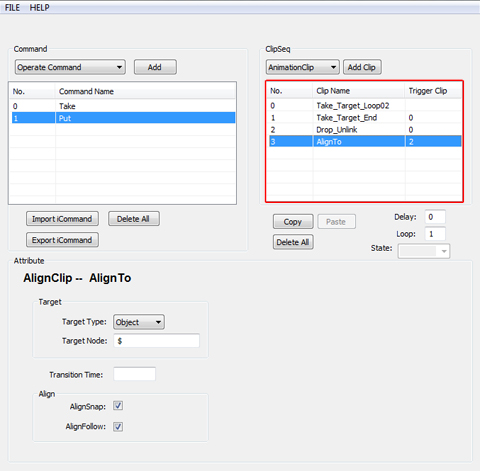
Set
Trigger Clip for the clips of the Put Operate
Command. Think about the motion when you drop an object from you
hand. First, I will reach to the place to drop the object. The
unlink will happen and at the same time the character ends its
dropping motion. Then the object drops onto the ground. Now you know
that the order to the clips, it's easy for you to set the trigger
clips for each clips.
Just a reminder, remember to think about the animation sequence and the
relationships between clips. This way, when you set for the trigger
clips you won't have troubles with the clips.
|