So
your character is a scary motor cycle dude in a leather jacket?! Well,
that means nothing if you can’t get his motorcycle to drive around.
Wheels got to move. The bike has got to lean in the turns. You need to
accelerate, decelerate, turn left or right. If the bike can’t do this,
then all you have is fancy looking prop and your character is going to
be hitch-hiking. But don't worry, in this lesson we will guide you to
the options of setting different states of the motorcycle. Add some
movement mode, and then you don't need to call the ambulance for your
next ride.
Compared to the forward rotation template which was prop movement
without using animation clips, this tutorial teaches how to use
animation clips in this template to define movements. In this lesson, we
will focus on the animation clips which cooperate at different states of
move. E.g. straight, accelerate, decelerate and right/left turn. These
states are referred as State in move command. It allows you to
have full movement control using pre-designed animation clips, and how
to map those clips to it's corresponding movement STATES, such as
move forward (W), left turn (A), right turn (D),
acceleration, and deceleration. State is only effective in move command.
So different states only apply to the move command that enable the
mobiles to move faster, slower and etc.
- Build your model in 3ds Max.
-
Create animation clips for accelerate (wheel movement from slow to
fast), straight (wheel turning in a steady speed), decelerate (wheel
movement from fast to slow), left turn (motorcycle lean left, wheel
runs steadily and turn left) and right turn (motorcycle lean right,
wheel runs steadily and turn right). When creating the motions for
the target clip, think about how the target clip will move. For
example, when you do accelerate clip, you might create tires that
speed up. Straight, you might have an animation clip that the tires
running in steady speed. For decelerate, you might have animation
clips where the tires are running from high speed to low speed. Left
turn, motorcycle and tires both turn left. Right turn, motorcycle
and tires both turn right.
-
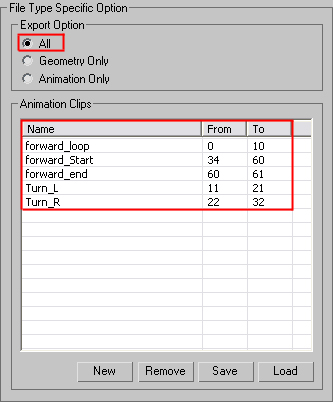
When exporting animation clips from 3ds Max, define the range of
each animation clips by giving each clip a name in different state.
Start AML
Scripting
- Import the AML into the Script
Editor.
-
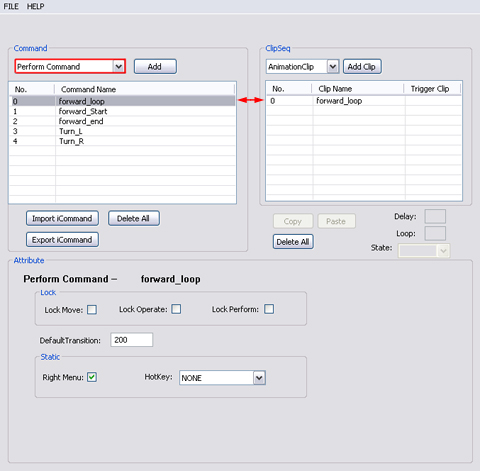
Notice that this script only contains five Perform Commands with an
additional clip to each Perform Command.
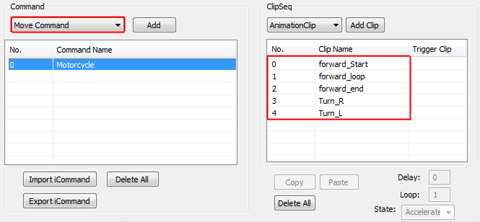
- Since Move Command controls the movement of
the motorcycle, I would move all the Perform Command clips to Move
command.
- Create a new Move Command from the command
drop down list.
- Copy and paste all the Perform Command's
animation clips to the Move Command.
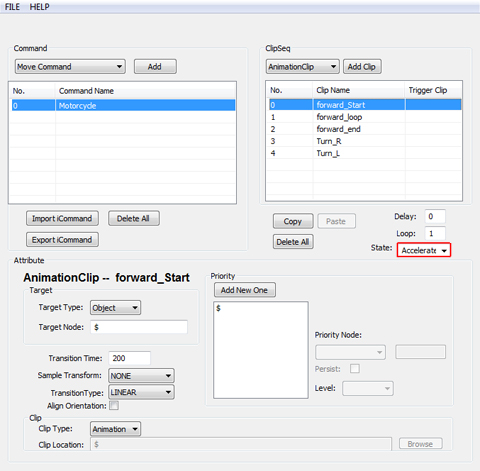
Set State
State is the condition you set for props or
characters when in move command. In Director Mode, depends on the move
state you are in it plays the animation clips you set in 3ds max. These
states include:
accelerate, straight, decelerate, left turn and right turn.
- Select "forward_Start" clip and change
the state to "Accelerate". When you define accelerate it
plays the animation you created for accelerating in 3ds Max.
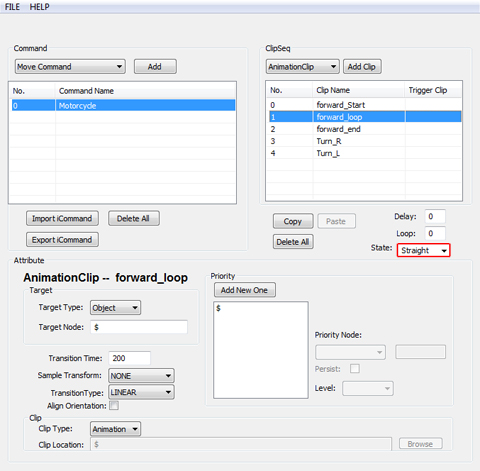
- Select "forward_loop" clip and change
the state to "Straight". When you define straight it plays
the animation you created in 3ds Max.
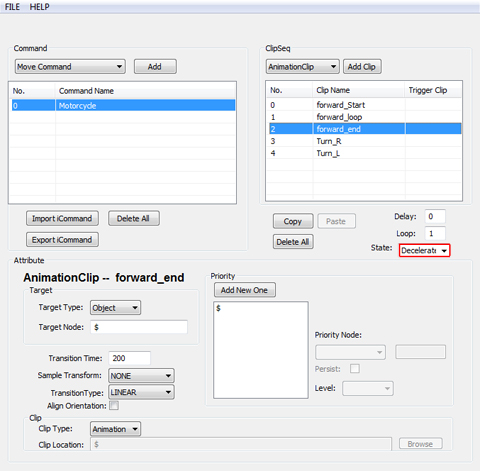
- Select "forward_end" clip and change
the state to "Decelerate". When you define decelerate it
plays the animation you created in 3ds Max.
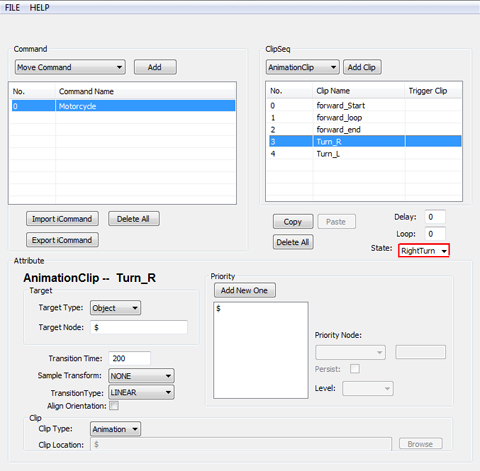
- Select "Turn_R" clip and change the
state to "RightTurn". When you define right turn it plays the
animation you created in 3ds Max.
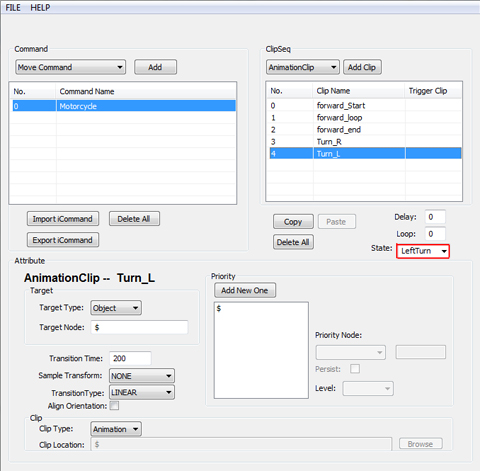
- Select "Turn_L" clip and change the
state to "LeftTurn". When you define left turn it plays the
animation you created in 3ds Max.
In iClone, the motorcycle now plays the animation you created in 3ds Max
for different states: accelerate, straight, decelerate, right turn and
left turn.
|