So Avatars and character can do
performances, does this mean that props can’t do performances?
Absolutely NOT! Of course they can do performances! They can move,
transform and jump around like a dancing toaster… what ever your
imagination conjures up! In this lesson, you will learn how to create
the
Perform Command trigger clips and the hotkeys!
This sample
shows how to trigger prop animations in different sequence by using different
hotkeys.
Preparing the Settings in iClone:
-
Create animation clips (scale, move,
rotation) for props using collect clips
-
Assign hot key to each animation
-
Rearrange playback sequence using
"trigger clip"
-
Learn how to Copy/Paste Animation
Clips, and Swap orders
Making your own iProp animation clips via Collect Clip
- Apply any desired 3D block to the current project. Make sure the
position is at the origin, (0, 0, 0).
- Open the Collect Clip and Transform
tracks of the block.
- Add scale keys at different frames on the Transform
track to generate key-frame animation for the block.
- Drag in the Collect Clip track to highlight a range for
generating new animation clip.
- Right-click within the range of the Collect Clip track
and select Add to Library. Name the clip "Scale" and
click OK.
- Clear all the scale keys. Now create rotation keys at different frames
on the Transform track.
- Add the keys to the clip library and name the clip "Rotate".
- Create another clip for move and name the clip "Move".
Modify AML Script
- In iClone, check to see if all the animation
clips have been added to the prop. Then go to DramaScript and export script.
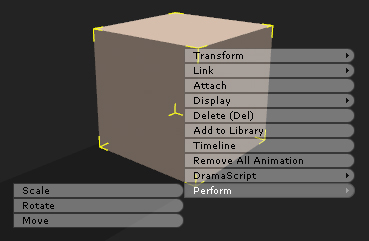
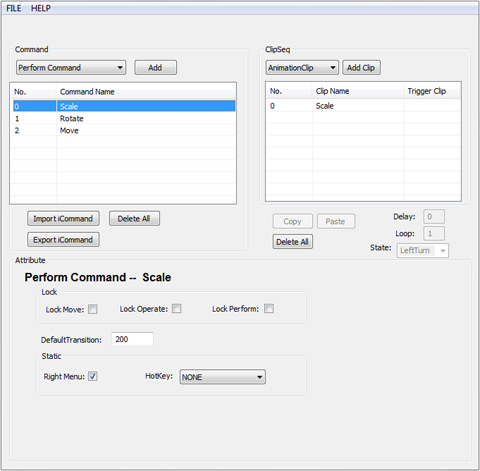
- Launch the script in AML ScriptEditor. You can see
iClone automatically generates Perform commands for Props when we use Collect
Clips to save animation clips.
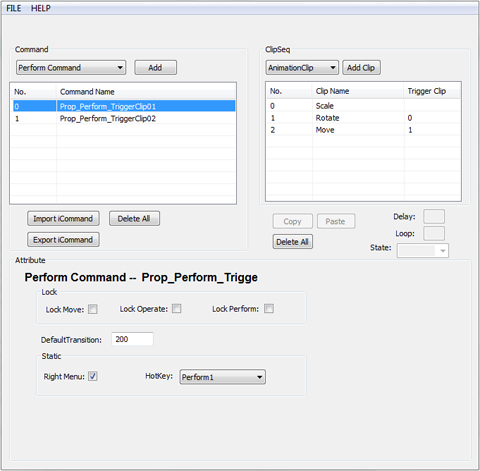
- In this sample, we will show you how to arrange two
commands to playback the three clips in different orders like this.
Follow the steps below to learn how to quickly rename
commands, copy and swap clips in AML Editor.
- First, double-click on "Scale" in the command name column. Rename the
command "Prop_Perform_TriggerClip01".

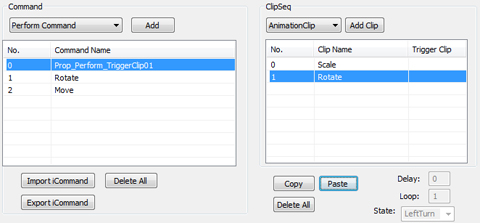
- Select "Rotate" command. Then select "Rotate" clip and
click "Copy". This now copies the Rotate clip and you can
paste onto other perform command.
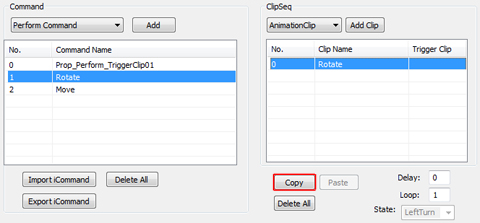
- Select "Prop_Perform_TriggerClip01" command and click "Paste"
to add rotate clip.
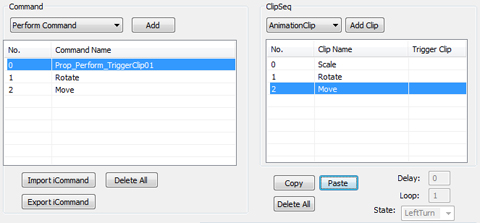
- Select Move command. Copy move clip and paste the
clip to "Prop_Perform_TriggerClip01" ClipSeq section.
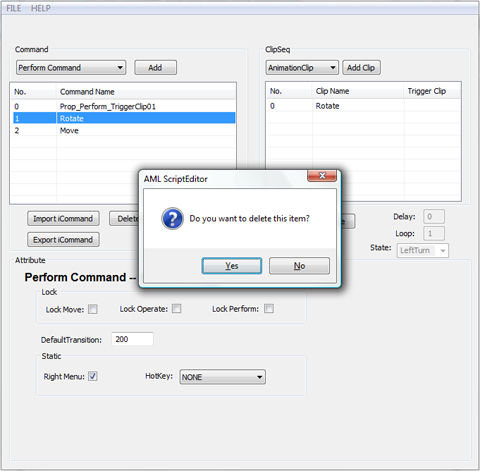
- Click Rotate command and press delete key on the keyboard. Delete the
move command too.
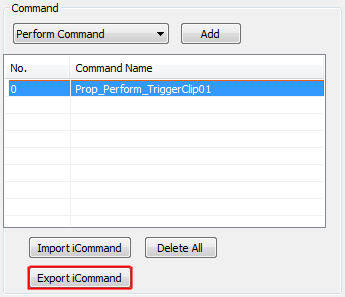
- Select "Prop_Perform_TriggerClip01" and click "Export iCommand".
- Click "Import iCommand" to import the command you exported. The
command now adds to my command list. Rename the command "Prop_Perform_TriggerClip02".
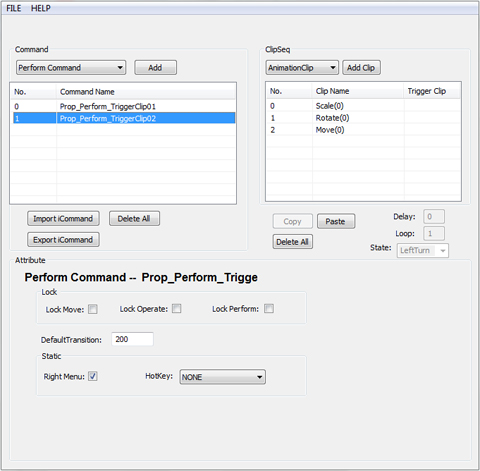
- Select first command and set hot key "Perform1".
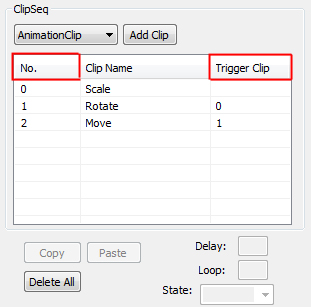
- Assign trigger clip to the clips. How to assign? No. column is
the reference number for you to place in the trigger clip column.
Insert "0" for the Rotate clip for it to play after Scale Clip.
Insert "1" for the Move clip for it to play after Rotate clip.
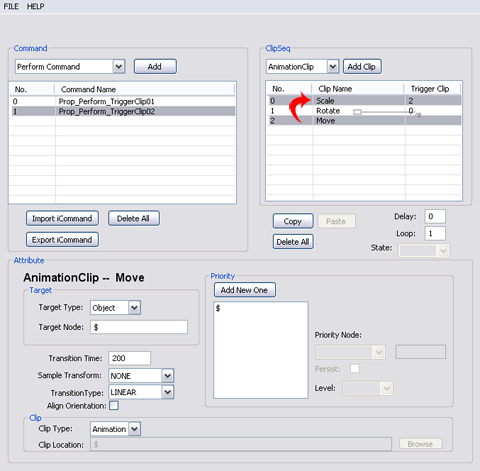
- Select "Prop_Perform_TriggerClip02" command and assign hot key "Perform2".
Drag and move the clips to swap the clips of "Prop_Perform_TriggerClip02"
in the order of Move - Scale - Rotate to vary from "Prop_Perform_TriggerClip01"
command clips, Scale-Rotate-Move.
- See! The order varies, Move - Scale - Rotate.
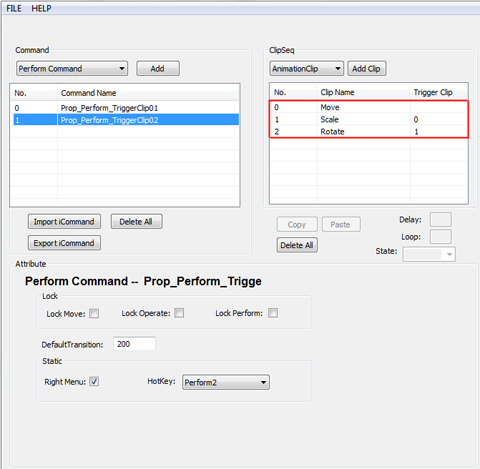
Create some variation movement for your prop when perform.
|


